Tuesday, June 3, 2008
Goodbye 2nd period students!!
CONGRATS TO ART SHOW WINNERS!!
1st place---Casey Sloate
2nd place---Drew Keenan
3rd place---Barry Lawler
I am proud to say that all three are students of my Photography I classes!! GREAT JOB!!
Thursday, May 29, 2008
NHIs---Last Chance!!
OBX montage-210
Macro-26, 210, 212
Composition paper- 21, 22, 210, 212, 214
Backlight Project- 21, 22, 24, 26, 210, 212, 217
Collage (any subject)- 212
Backlit Landscape- 21, 22, 24, 26, 27, 210, 212, 213, 214
Text- 212
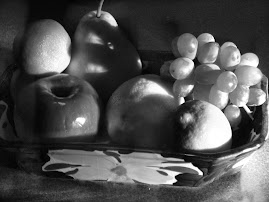
Food Still Life- 21, 22, 24, 26, 27, 210, 214
Action- 21, 24, 27, 210
Nature Collage- 21, 22, 24, 27, 210
Metaphor Self-Portrait- 21, 22, 24, 26
Black and White- 22, 24
Career paper- 21, 22, 26, 27, 210, 214
Final Portfolio- 21, 24, 27
PLEASE NOTE: If you have more than two NHIs in this class, you almost certainly have an 'F'. If you have done these projects, PLEASE get them turned in! Make sure they are JPEGs and make sure you place them in the TO TEACHER>Late folder. The name of the project should START with your Class ID# so that you get proper credit for your work!
EXAM EXEMPTIONS
25, 29, 213, 215, 216, 217, 219, 220, 221
THIS LIST IS SUBJECT TO VERIFICATION WITH ADMINISTRATION AS TO ATTENDANCE/TARDIES, UNEXCUSED ABSENCES. IT MAY CHANGE! FINAL LIST WILL BE PUBLISHED FRIDAY, MAY 30TH, 3:30P.M.
Wednesday, May 28, 2008
Study for Exams!
Know about the photographer you presented to the class.
Know about at least one other photographer we studied (from reading, films, or other presentations).
Know the basics about 35mm photography.
Know how to get the proper exposure.
Know about action photography and how to get blurred action and stopped action shots.
Know about composition. Read over your research paper on the topic!
Read over your career research paper.
Know when and when NOT to use the 'automatic' setting on your camera.Read over our early worksheets and hand-outs.
Know PhotoShop! Know where to find all the tools. Go over the PhotoShop handouts if you are unsure.Understand terms like Bits, Bytes, Pixels, dpi, ppi, Histogram, Hue/Saturation, Noise, Resolution, RGB, JPEG, Exposure, F-Stop, Aperture, Point-of-View, Composition, Shutter Speed, Exposure, Dodge, Burn, Redeye, etc.
As you know, we do not have textbooks that go home with students. If you have any questions about the above topics, please look them up in class or ask! I should have a list of potential exam exemptions by Friday.
Friday, May 23, 2008
NHIs---VERY IMPORTANT!!!
Monday, May 19, 2008
Final Portfolio Presentations
Zero-Not submitted or Does not meet criteria of assignment
3.5-Below average; Shows minimal effort and lack of pride in finished product; Shows little creativity or technical skill
4-Average; Adequate interpretation of assignment, but could have been improved with more effort; Shows average level of creativity and technical skill
5-Above average; Shows high degree of imagination, effort and technical skill; Went beyond assignment’s requirements with pride in finished product
When I add it all up, I'll have your final grade. It will count as a double project grade. PLEASE give this your best effort! We will critique each photo while you present your portfolio. This will also serve as a review for the final exam as we discuss the elements of composition.
Friday, May 16, 2008
Final Portfolio Project
FINAL PORTFOLIO PROJECT
Due Date: May 21st, end of class period
Format: PowerPoint
Criteria: Students will produce a 22 slide PowerPoint presentation highlighting their best work in Digital Photography I. It will include a title slide and a final slide containing an honor statement as well as the following photos:
1) Architecture or Architectural Detail—man-made, permanent structure should be the primary focus
2) Landscape, Student’s choice (“calendar shot”—the goal is beauty)
3) Black and White of Student’s choice
4) Macro photo
5) Nature shot
6) Candid photo of school life
7) Posed Portrait, retouched as necessary
8) Student’s best collage
9) A Montage
10) Photo which shows action/movement
11) Backlit close-up photo (with or without flash)
12) Backlit Landscape
13) Family/Relationship-themed collage
14) Unique photo showing creativity—student’s choice of subject matter
15) Still Life photo of food/beverage
16) Student’s choice of photo showing use of a creative filter
17) A Vignette
18) Metaphor Self-Portrait Still Life (not a collage!)
19) Field Trip photo (Wright Memorial or Butterfly Garden)
29) Created artwork showing student’s best use of PhotoShop tools on a photo/photos
Title and end slide should show similar design features. End slide will be the honor code stipulating that you took all photos personally and during this semester. Use transitions and animation on your slides, but do not automate your slide show.
Note: A PhotoShop canvas size of 10 inches wide by 7.5 inches high is the equivalent of a PowerPoint slide. Each photo will be graded individually on effort, creativity, imagination, and technical skills. Do not submit photos with serious photographic errors such as red eyes, out-of-focus, underexposed or overexposed, etc. Put slides in order! You may add titles if you wish, but it is not required. If you add titles, make sure they are an enhancement, not distraction! You will give an oral presentation with your slide show. Be prepared to elaborate on how you created each piece, and answer questions. This project will make up a large percentage of your final grade. Do a good job!
Wednesday, May 14, 2008
Paper on Photograpic Careers
Try these links:
http://www.khake.com/page45.html
http://www.careersinthemilitary.com/index.cfm?fuseaction=main.careerdetail&mc_id=59
http://www.learndirect-advice.co.uk/helpwithyourcareer/jobprofiles/profiles/profile563/
http://hallmark.edu/weekbyweek/
http://www.goang.com/careers/detail/?j=927
http://virtualcollegeadvisor.com/arts/photography.php?referer=http://search.yahoo.com/search?p=photographic+careers&ei=UTF-8&fr=yfp-t-368-s&xargs=12KPjg14FSr4e9mvinEOOIMLrcmUsOkZ%2Dx8bo%5FXIR7GtYq8DtcV%5FwmXuHJwPUmEK7O2A94%2D8jXqfZUf6uZzbjPTkrNEmGMGpIe641W9slshJGiLT12hUccMsvdn4ZYeiZTJXcZS3KaJsrVkORNA34rzt8g%5Fh7t%5FORsx9EO9BcoIrvbzVB%2DUX3XVSc17QwZtZ2QPJl9S7F0T%2Dk%2E&pstart=7&b=21&campaign_id=11828712&
http://www.kiwicareers.govt.nz/default.aspx?id0=1050103&id1=J58841&id2=4A81D424-8D2B-45C4-AA70-19EFFEC09E8F
http://degreedirectory.org/articles/Professional_Photographer_Bachelor
http://www.kodak.com/US/en/corp/careers/students/imagescience.jhtml
http://www.careerbuilder.com/JobSeeker/Jobs/JobResults.aspx?strcrit=rawWords%3Dphotography%3Bcty%3D%3Bsid%3DALL%2C+US%3Bcid%3DUS%3Bfre%3D30%3BJN%3DAll%3BETD%3DJTFT%3BETD%3DJTPT%3BETD%3DJTIN%3BETD%3DJTCT%3B&cbRe=&cbRecursionCnt=1&cbsid=e1e8bb89a828449c873d36788962aa6e-264073640-J4-5&ns_siteid=ns_us_y_careerbuilder_photogr_
http://www.digitalphotographywebsite.com/photographerjobs.html
Tuesday, May 6, 2008
INTERIMS
B&W Student Choice
Monday, April 28, 2008
Metaphor Self-Portrait
Metaphor--1) A figure of speech in which a word or phrase that ordinarily designates one thing is used to designate another, thus making an implicit comparison, as in “a sea of troubles” or “All the world’s a stage” (Shakespeare). 2) One thing conceived as representing another; a symbol: “
Still Life--Still life is the photography of small groups of objects, either found or put together for the purpose. It may simply be concerned with formal qualities (tones, textures, colours, shapes, form etc) or have a more metaphorical intent.
Check out these sites:
http://www.shutterpoint.com/Photos-BrowseCat.cfm?cat_id=7
http://www.shutterbug.net/refreshercourse/lens_tips/1205back/
http://www.betterphoto.com/gallery/dynoGall2.asp?catID=17
Most of what you see here is considered ‘Still Life’ photography involving various inanimate objects in a pleasing arrangement.
Read these instructions carefully. This photograph is about you. It is a portrait of you. The only thing different is that you are not in it. This picture is a still life, a metaphor that contains at least three things that represent who you are. Your friends should be able to look at it and recognize you in the picture. This picture should not contain any living things, only still objects. It should represent things you are passionate about.
Pay special attention to lighting and arrangement of the items. Change them up and see what works best. You will make a contact sheet with 12 different photos that represent YOU. This contact sheet will be due on Monday, May 5th. A contact sheet of the best 6 photos edited will be due on Wednesday, May 7th, along with your best color 5x7 JPEG. You may apply filters if you wish.
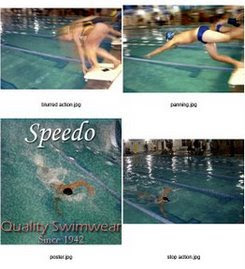
Next topic---Action Photography
Stop Action
Blurred Action
Panning
Find examples of each. These shots are created by adjusting the shutter speed. Read up on the mechanics involved in this type of photography. You will be re-creating each of these techniques. Our goal will be to create stop action, blurred action, and panning in the camera. If not, these effects may be created in PhotoShop through use of the 'Motion Blur' filter. Practice using this filter on your photos.
Research using these links:
Professional Photographers who specialize in Action Photography:
http://www.padulaphotography.com/
http://www.actionsportsinc.com/eventdisplay.aspx?is=9
http://www.actionathletics.com/
http://www.actionsportsphotography.sasktelwebsite.net/
http://www.actionsportspress.com/
http://www.greggriess.com/action_main.htm
‘How to’ Sites:
http://photo.net/learn/sports/overview
http://www.popphoto.com/popularphotographyfeatures/4016/how-to-photograph-baseball-and-softball.html
http://www.nyip.com/ezine/sports/golf.html
http://www.squidoo.com/action-photography/
http://www.nyip.com/ezine/sports/football.html
http://www.popphoto.com/popularphotographyfeatures/4334/how-to-show-an-action-sequence.html
http://www.schoolofphotography.com/if/infocus22.html
Your Action Project will be to leave a contact sheet of 12 action shots right out of your camera on May 1st. Then you'll create four images---a stop action, a blurred action, a panning shot, and a poster with text. Make a contact sheet of these four shots for your final submission on Thursday, May 2nd.
Thursday, April 24, 2008
Photo Contest!!
sponsoring a 'Young Weather Photographers' contest for students between the
ages of 7-16. The deadline to submit a photo is June 30. Contest details
are available online at
http://www.nc-climate.ncsu.edu/education/contest.php.
Questions may be
directed to Shannon Futrell at safutrel@ncsu.edu.
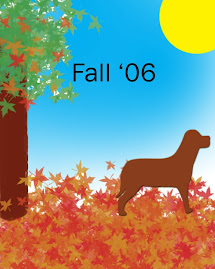
Text
Go to the following sites and check out the tutorials for PhotoShop text:
http://graphicssoft.about.com/od/photoshoptutorialstextfx/Creating_Text_Effects_with_Photoshop.htm
http://www.photoshopessentials.com/photoshop-text/text-effects/image-in-text.php
http://www.planetphotoshop.com/category/text?id=tutorials_text
http://www.dwphotoshop.com/photoshop/textindex.php
http://www.tutorialized.com/tutorials/Photoshop/Text-Effects/1
http://www.fstutorials.com/category/photoshop_text_effects_tutorial/9/
http://www.photoshoproadmap.com/Photoshop-blog/2007/07/22/the-best-80-photoshop-text-effects-on-the-web/
http://www.designvitality.com/blog/2007/09/photoshop-text-effect-tutorial/
Choose several that you particularly like, and follow the step-by-step instructions to create your own special effects text. Start each one on a new 8x10 canvas. On Friday, you will print a contact sheet of your best FOUR creations in color! Use your choice of special effects and your choice of words. Keep it imaginative, but clean! Project will be graded on creativity, skill, and effort, with consideration for level of difficulty.
Tuesday, April 22, 2008
NHIs
*8x10 Montage of at least 6 OBX shots
*Macro (contact sheet of 12, 6 edited, 1 best 5x7 JPEG)
*Research Paper on composition (explanation and sample photo on specific topics you were given)
*"Theories" photo shoot (contact sheet of 12 labeled shots, 6 on word doc. with explanation)
*Backlit Project (6 you like from Internet on word doc., 12 on contact sheet with and without flash, 6 edited, best pair side-by-side)
*for tomorrow, Collage using elements of at least three photos
*for tomorrow, Backlit Landscape (contact sheet of 12, 6 edited, 1 best 5x7 JPEG)
As I have told you several times, this is a class where NHIs will really hurt since projects make up 60% of your grade. If you have not turned in any of the above, PLEASE get them in to the late folder!
Monday, April 21, 2008
Still Life Photography
http://webhome.idirect.com/~dpl/gallery1.html
http://www.betterphoto.com/gallery/dynoGall2.asp?cat=17
http://www.usefilm.com/photo_category/16/Pictures_of_Still_Life.html
http://www.apogeephoto.com/mag2-6/mag2-7winners.shtml
http://www.stilllifewith.com/2006/07/14/photo-contest-from-food-wine-magazine/
http://stilllifewith.com/2006/12/01/stw-challenge-for-december-tradition/
http://digitalmedia.oreilly.com/2004/09/15/food_photos.html
http://www.markhemmings.com/MarkWebsite/food_photography/index.htm
http://dessertfirst.typepad.com/dessert_first/2006/05/food_photograph.html
Basic Principles of Still Life Photography:
Throughout the decades, artists have depicted still life scenes—arrangements of inanimate objects—in paintings and photography. Shooting still life subjects is one of the best ways to sharpen your photographic skills. You can take your time, and your subject remains stationary.
Good composition, framing and lighting are all very important to translate your still life into a great photo. Every day we are bombarded with still life images of appetizing foods, shiny housewares and other appealing products in magazine ads, brochures and catalogs. Professionals spend a great deal of time setting up these shots and you can learn a lot just by studying the photos you find most appealing and unique.
Notice how photographers use repeating shapes and lines to create patterns and use complimentary colors. Study the lighting that they use. Simplicity is very important when composing still lifes. You don’t need to collect a wide range of complicated objects to create an interesting picture. Instead, choose a few objects with a common thread.
The arrangement of a still life should begin with the positioning of a single dominant subject. Then add other objects one at a time, and examine the arrangement through your camera’s viewfinder. Experiment with your camera angle until the scene shows the elements in the most pleasing balance. Photograph the original grouping, and then rearrange or remove objects to see if it improves the composition.
Your next project will involve setting up a still life of specific objects and photographing it. To help prepare you, read the previously mentioned articles and find 6 still life photographs from the Internet that you particularly like. These photos should include only inanimate objects. Paste the 6 photos to a one-page word document (two columns) and write a short paragraph about each. Tell what techniques the photographer used that appeal to you. This will be due at the end of class Friday, April 25th. Turn in a hard copy, and leave a copy in the completed assignments folder.
Over the weekend, take still life photographs of FOOD AND/OR BEVERAGES. Experiment with the arrangement and lighting. Take some photos with flash and some without. Be creative! Think about the elements of composition we have just studied.
Be prepared to work with your food photos Monday, April 28th. A contact sheet of 12 will be due at this time. If you do not have your photos Monday, you will be writing a paper on still life photography while the rest of us work in PhotoShop. The 6 edited and best 5x7 are due at the end of class. The alternative assignment, a 3-page paper on Photographic Still Life, is due then as well. We will move on to the next topic Tuesday. Unless you are absent Monday, you are expected to have this project completed that day.
Friday, April 18, 2008
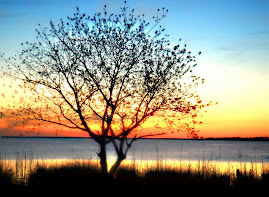
Backlit Landscape for Monday
Wednesday, April 16, 2008
Collage
Camera Test Friday
Next week you will take a Critique Test where you'll have to write a critique on a piece of art. You'll need to be able to identify the use or misuse of techniques of composition, and be able to describe using all the proper terminology.
If you have completed your research paper, both these tests should come easy for you. If not, you are late with the paper, and will likely fail both tests. If you're that far behind, please plan to come in after school to catch up!!
Monday, April 14, 2008
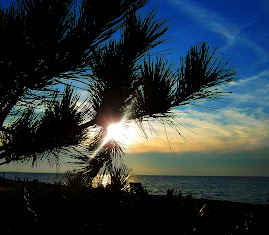
Backlighting Project
Our project will be to concentrate on backlighting, which is anytime the light is coming from behind the subject.
Here is a copy of the handout on this project. Contact sheet due 4/14 and final project due 4/18.
Backlighting Project
Read the article at www.picturecorrect.com/photographytips/backlighting_photography_tips.htm
Read the article at
www.apogeephoto.com/may2005/wtbird5_2005print.html
Use the Internet to find six backlit photos that you particularly like. Copy and paste to a word document—one page, two columns. Write a short paragraph about each photo explaining what you find appealing about it. Turn in to completed assignments folder.
Take 35-40 photos that are backlit. These should be a mixture of natural scenes and scenes you set up, all close-up’s (within 8 feet of subject). For each shot, take one with a flash, and one without. Make a contact sheet of the best 12. I am looking for photos where the backlighting is obvious, and enhances the subject. Turn in the following photos for your final project grade:
-One 5x7 JPEG close-up, interior or exterior, with backlighting—no flash!
-The same close-up shot, backlit, but with fill light from a flash
The two identical photos should be placed side-by-side before submitting for grading.
When you complete this project, you will have three pages:
1) The word document with the six photos you found on the Internet and captions describing what you like about them
2) The two identical 5x7’s, one with flash and one without, mounted side-by-side
3) The contact sheet of your 12 best shots
Thursday, April 10, 2008
More on Composition
http://photoinf.com/General/Wendy_Folse/Composition_Part_II_Horizontal_or_Vertical.htm
http://photoinf.com/General/Wendy_Folse/Composition_Part_III_Perspective_Focal_Point_Cropping.htm
www.larrysizemore.com/articles/COMPOSITION.pdfhttp://
www.scphoto.com/html/composition.html
Wednesday, April 9, 2008
Theories of Composition Photo Shoot
“Theories of Composition” Photo Shoot
We have studied various elements of design and techniques for achieving good photographic composition. Your assignment is to take a number of photographs that illustrate the following:
· Proper use of the Rule of Thirds
· Good choice of background to accentuate subject
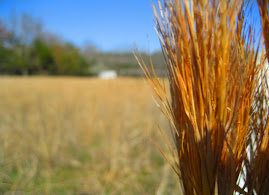
· Depth of field used to accentuate the subject (selective focus)
· Perspective lines used to create depth
· Demonstration of scale
· Framing with objects in foreground
· Unusual point of view to create interest
· Dynamic composition with proper use of diagonals
· Emphasis on texture
· Use of repetition (either color, shape, or line)
· Good use of negative space
· Asymmetrical balance
· Positioning action moving into frame
We have also discussed design mistakes that should be avoided. Take photos that illustrate what NOT to do:
· Merging
· Poor choice of background
· Subject moving or looking out of frame
· Undesirable cut-off
· Centered composition (boring, static)
· Lens flare
· Lack of simplicity where subject is not clearly defined
Download the photos and make a contact sheet showing 12 different topics outlined above. Do not edit in PhotoShop! Use them just as they came out of camera. Title each photo to indicate what you are illustrating. Select the six that you feel best illustrate six different topics. Copy and paste to a Word document with a paragraph about each photo. You should describe how each photo depicts good composition through the proper use of these techniques or poor composition because of design mistakes. Leave the contact sheet in the completed assignments folder on the 'N' drive. Print the word document and hand it in.
Perspective vs. Point of View
Students often have difficulty understanding the difference between these two terms. I'd like to try to clarify this for you. For purposes of this class I’d like for you to think of them in this way:
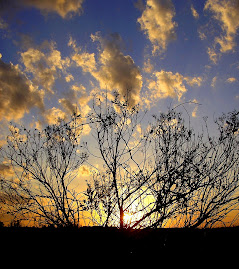
PERSPECTIVE:Imagine standing on a path with a row of trees running along the side. As you look out to a point on the horizon, you’ll naturally see that the path, and the trees appear to get smaller the further away they are from you. This demonstrates the principle of linear perspective. When you shoot a photo that clearly shows linear perspective (objects getting smaller the further they are away from you), you visually add a greater sense of depth to the image. An explanation based upon the rules of geometry can be found at http://www.ski.org/CWTyler_lab/CWTyler/Art%20Investigations/PerspectiveRules/PerspectiveRules.html . A less complicated explanation which addresses the topic as it relates to art is presented at http://www.handprint.com/HP/WCL/tech10.html .POINT OF VIEW:Point of view refers to the physical location of the camera with respect to the subject. Every scene has many points of view. Your job is to find a viewpoint that is unique and interesting. There is no law that says all pictures have to be taken from eye level and straight on. In fact, this type of photo is usually somewhat boring and uninspired. By taking a picture from a different angle, you can produce a totally new feeling, mood or effect. The worm's eye view can be pretty interesting. By lying down on your stomach, you can get flowers in the foreground to frame your subject. If you are taking pictures of small children or pets, getting the camera down on their level can improve results. You can also avoid cluttered or ugly background by changing your point of view. Climbing up on things and looking down from a high point of view offers lots of different opportunities. The creative photographer will experiment with many different positions of the camera. Read more about this at http://www.montenagler.com/Article021906.asp
Monday, April 7, 2008
This week's assignments...and grades!
Don't forget that we do not have access to our computer lab on Tuesday, April 8th. Therefore, we will work outside if the weather permits, or in the library if not. BRING YOUR CAMERA!! I will plan for us to take photos that illustrate the theories of composition.
You should also begin your research paper today, with the final paper due on Friday, April 11th. It is important that you address EACH of the topics I have given you, and find photographic examples for EACH. Do a good job on this. It will be graded like a project (60% weight).
Several of you will be disappointed when you see your report cards. You MUST pay attention to these deadline grades! While the weight for deadlines is only a small portion of your final grade, several zeroes can really hurt you. One missed deadline can drop your grade a couple of points. Several can bring you down a letter grade or more. If it's Monday, you owe me pictures for a deadline grade of 100 or zero!!!
Also, several of you had NHIs that were never submitted. At 60% of your final grade, even one missed project can seriously hurt in this class. Make sure you save things properly, with your identification number and as a JPEG. ALWAYS check to see that what you think you've turned in actually gets saved so that you can receive credit for your work. Remember to keep a copy of everything you turn in!
To recap....By Friday, April 11th, you should turn in your Macro 12-6-1, your research paper on 'Photographic Composition', and the photographic assignment I will give Tuesday on our field trip. Our next unit will be 'lighting'!
Wednesday, April 2, 2008
For Monday...
http://photo.net/learn/macro/
http://en.wikipedia.org/wiki/Macro_photography
http://www.shutterbug.net/techniques/outdoor_travel/0803sb_amacro/
http://www.crystalcanyons.net/pages/TechNotes/3DMicroMacro.shtm
http://www.edbergphoto.com/pages/Tip-macro-tools.html
http://www.edbergphoto.com/pages/Tip-macro-examples.html
http://www.pdnonline.com/pdn/cp/olympus/technology/article_display.jspvnu_content_id=1003285355
Take 35-40 pics of various objects extremely close-up. In most cases, you will use the 'Macro' setting, or 'tulip' icon. If your camera doesn't take a good, clear close-up, find out what is the closest distance you can get a picture in focus---and stand that far away from your subject. We can sharpen a photo up a bit in PhotoShop, but it needs to pretty much be in focus. Experiment with your own camera. Some will be able to take really good clear shots that will amaze because they are SO close-up. Others will have to stand back a ways to get your subject in focus. We can always zoom in while cropping in PhotoShop if you have trouble. Make sure you are on the correct setting! Use the theories of composition we just learned!
Tuesday, April 1, 2008
IMPORTANT!!! NHIs
If your number is listed here and you have completed it and believe you have turned the project in, just submit another copy. You should be retaining a copy for your records of everything you do. You may have turned it in with no number or the wrong identification number, or maybe you saved it in the wrong place or without changing it to a JPEG. In any case, if your number is listed here, I do not have your work. Submit the ENTIRE project (all pieces) to the late folder by 5:00 to get credit for the work on this report card.
The following are NHI as of 3:30, April 1st:
Architecture Project (contact sheet of 12 straight out of camera, 6 edited, 1 best 5x7)--
21,24,210
Spirit Week Project (Word doc. of photos w/captions or alternative 5-page paper)--
21,24,210,219
Depth of Field (12-6-2 same shot, showing both shallow and deep depth of field)--
21,24,26,27,210,212,219
Portrait Retouch (contact sheet of 12 and 8 before and afters, one w/vignette)--
22,24,210,212
PhotoShop Techniques or "Paint Project" (painting and list)--
21,24,26,210,212,219
8-1 exercise (contact sheet of edited photos and list)--
24,27,219
Landscape or Seascape (12-6-1)--
21,22,24,26,212,219
Clothing Advertisement (contact sheet of 12 full body shots and final ad)--
21,22,27,217
Research Paper on Composition
Here are the written instructions from the hand-out you received in class:
Plan and write a report on Photographic Composition. Use the books in the classroom and/or photography sites on the Internet for your research. Include each of the following topics:
Lens choice
Rule of thirds
Background choices
Depth of field
Perspective
Framing
Point of View
Use of lines, shapes, form, pattern, textures, etc.
Explain each topic and include photos which are examples of each. You may use your own photos, or get them off the Internet. If you get photographs from the Internet, remember that you must give credit to your sources. Give photo credit under each picture in your report. If you use your own pictures, be sure to give yourself credit! Write your paper in essay form, in your own words. DO NOT COPY AND PASTE! Be sure spelling and grammar are correct, your examples look good, and your paper is well organized. List “Works Cited” at the end (bibliography).
Grading will be as follows:
Opening---What is composition? (5 points)
Lens choice, explanation and examples of several (10 points)
Perspective, explanation and examples (10 points)
Subject/Rule of thirds, explanation and examples (10 points)
Choice of Background, explanation and examples of good and poor choices (10 points)
Depth of Field, explanation and examples of several types (10 points)
Framing, explanation and examples (10 points)
Point of View, explanation and examples of each type (10 points)
Use of lines, shape, form, pattern, texture, etc., explanation and examples of each (10 points)
Closing---Summary (5 points)
Layout, general appearance, and ‘Works Cited’ (10 points)
You will be given three hours to research and write this paper. Do a good job!
Montage
Your smaller pictures that you use in the foreground should have unity in theme, color, or pattern. Each photo (layer) should have some special effect like 'dropshadow' or 'beveled edge'. Make sure the photos "flow" and are not disconnected from one another visually. Try not to use any set pattern for the placement of the smaller photos.
Your montage should include the text of your choice and your name. Do something special with the lettering as well!
When you have finished, leave your 8x10 montage in the completed assignments folder with your ID number. This is due on Thursday, April 4th. Do a good job!
Monday, March 31, 2008
Catalog Page Deadline...and other important dates!
Also, I would suggest that each of you check back in the entries of this web page, and make sure you have turned in all projects listed here. Even if they are past due, turn them in!! You do not want a 'NHI' in this class! I will take late work until April 2nd, 5:00p.m. After that, I HAVE to close out grades for this report card.
Wednesday, March 19, 2008
For Spring Break...
If you are going to be away for break, your photos can illustrate your holiday location. However, since you won't be able to go back and duplicate missed shots, make certain you have enough pictures and that they are securely stored!
Next Project...
When you have finished the portraits, we are going to work with the full-body shots you had due on Monday. We will be putting together a catalog page this week using those photos. You will be experimenting with the color replacement tool in PhotoShop (same tool as is used for redeye) to show an article of clothing in several different colors. You may even want to design a pattern to use! Your "advertisement" must include text. Think about your font and size of type, as well as your background choice. You want your catalog page to really grab the attention of your "buyer". This will be due on Friday by the end of class.
Thursday, March 13, 2008
Portrait "Before and After" project
Be sure to take additional photos over the weekend so you'll have plenty to work with. Remember, it's more fun to work on an imperfect face!Your portrait project will be to ENHANCE four portraits through the retouching techniques we are learning, and show 'before' and 'after' shots. Make sure you don't permanently alter your original so you'll have a before photo to use for comparison!
You'll make contact sheets of 4 photos, showing two before and after shots side-by-side per page. You'll hand in two contact sheets at the end of class on Wednesday, March 19th. That's a total of 8 photos---4 'before' photos, and 4 'after' on two contact sheets.
I am looking for fairly drastic changes, so use your imagination! Some retouches will be natural-looking. I am not opposed to adding unusual things though (i.e. blue hair, whiskers, tattoos, etc.) You should do a good job with whatever you do and try to make it look realistic. Keep it clean! If you are working on the face of a family member, friend, or classmate, make sure what you do will not offend! Your retouched pictures will be critiqued on the big screen by all my photography classes.
Your grade will be based upon the amount of work done, technical skill, and overall appearance of final photos. If you choose a harder portrait to fix, you'll likely get a higher grade than if you choose one that needs very little work. At least one photo of the four must include a vignette.
CHECK YOUR FOLDER
Wednesday, March 12, 2008
Depth of Field
http://www.apogeephoto.com/feb2005/jaltengarten2_2005.shtml
Art Show!!
Next Photo Shoot...
Check out these sites for inspiration:
http://www.picturecorrect.com/photographytips/photographing_people_advice_tips.htm
http://www.picturecorrect.com/articles/preparing_portrait_photo_shoots.htm
Contact sheet of 12 photos will be due on Monday, March 17th.
PhotoShop Techniques Project "Paint Project"
Here's a copy of the list:
PhotoShop Exercise
Experiment with Toolbox/Options
Make a painting using each of the following techniques. Start with a blank page (no photograph). You may want to consult your handout of the Toolbox map (Toolbox is on the left of your screen; Options windows on the right; Menu bar at top). Briefly describe what you did for each step on the back of this page or on notebook paper.
*Open Adobe PhotoShop from ‘Programs’ or icon on desktop
*From Menu Bar--- File>new--- Create a blank page, 8"x10" RGB, 200 ppi, 16 bit
*From Menu Bar---Window>brushes, history, layers, color, swatches, tools, options (make sure these items are checked/window appears on the left of your screen for each)
*Select each of the following from the Toolbox and create a “painting”:
pencil (use several sizes)
paint brush (use custom brushes--select load brushes from Brush Palette menu; use texture brushes; pick several different sizes and shapes of brushes; experiment with options in Menu Bar---diameter, softness, mode, opacity, flow; click on all arrows to get other options; use airbrush-- experiment with adjusting pressure)
paint bucket (to fill in large areas)
*Select colors from Color Palette window—experiment with tabs (color, swatches, styles) *Experiment with color selection options in Toolbox (the two blocks of color, black, white, or whatever color you chose last)--background, foreground, switch colors using arrows
*Use Adobe color picker (click arrow in Color Palette window)
*Create several new layers (Layer>new); Copy something from background and paste to another layer-- Rename to indicate what’s there by double clicking on layer (the layer will be blue to indicate which one you’re accessing) Put something on each layer
*Use the eye dropper from the Toolbox to select a color from within the picture and repeat somewhere else
*Experiment with opacity (in Layer window) and other options (click arrow)
*Select an area with magic wand from Toolbox; Extend selection with wand by shift/click
*Experiment with layer styles (the cursive ‘f’ icon at the bottom of the Layer window)
*Soften an item on a layer by using filter>blur>Gaussian Blur
*Change the order of layers by dragging one to the bottom in the Layer window
*Experiment with show/hide buttons in layers (the 'eye' icon)
*Paint using the Wet Edges option in Brush window
*Use gradient (Toolbox); Experiment with all options
*Paint straight lines with shift/click
*Try the special effects brushes from the Menu Bar (click arrow)
*Experiment with feathering edges by using anti-alias (Menu Bar) before selecting an item with lasso: Feather edges on existing selections with Select>feather, an amount>ok
*Use the various eraser tools in Toolbox
*Use the zoom tool to work in small areas (Toolbox)
*Experiment with Edit>Transform>(All options---from Menu Bar)
*Add text/Enhance text with a special effect---‘T’ from Toolbox, then Layer>Layer Style>(experiment with your choice of special effects) from Menu Bar
*When painting is complete, experiment with various filters, particularly Artistic options and Sketch options
*Save in 'Completed Assignments' folder using your id#, then 'Paint Activity'
*Turn in your sheet with a brief description of what you did (checklist is fine)
*This will be graded as a Project—DO A GOOD JOB!
Field Trips!
...it's been a long time...
http://www.photoshoproadmap.com/Photoshop-blog/2007/05/15/a-complete-guide-to-digital-makeover-in-photoshop/
Use these sites to help with Portrait taking:
http://www.picturecorrect.com/photographytips/photographing_people_advice_tips.htm
http://www.picturecorrect.com/articles/preparing_portrait_photo_shoots.htm
Monday, February 25, 2008
sub...
Wednesday, February 20, 2008
Landscape/Seascape
Monday, February 18, 2008
Spirit Week Project
If you did not take Spirit Week photos (or did not take enough photos--minimum of 12), your assignment is as follows:
Since Spirit Week has passed, this is not an assignment you can turn in late. I feel that an alternative assignment should require an equal amount of effort as displayed by those who actually took their cameras out all week and got their photos, and the editing and caption-writing they are to do this week. That's only fair to the ones who put forth the effort to do the assignment.
Therefore, as an alternative to the Spirit Week project, you may hand-write a five page paper expressing to me how you might become a better Photographer, and a better Student of Photography. You may analyze specific study skills which would enhance your performance in class. You may talk about specific strategies you might adopt. You might also explore the different types of photography which appeal to you and how you can become a better photographer by using tips listed on the many Internet Photography Websites. You may specify the actual tips for each type of photography. A list of works cited should be attached to the five-page report. This should be hand-printed on notebook paper. Do not skip lines. Make your paper heartfelt and to the point for a passing grade.
Since projects make up 60% of your grade in this class, I suggest you take the next one seriously and put forth the effort necessary to get it done. However, I am willing to offer you this alternative so that you might pass this course!
Thursday, February 14, 2008
Substitute Friday
Be ready on Tuesday with your Spirit Week photos---an absolute minimum of 12. I am a little concerned that I haven't seen some of you taking pictures this week. You have through the weekend to get photos of any school-related activities. If you don't have Spirit Week photos, you will be writing a paper as an alternative.
Wednesday, February 13, 2008
SPIRIT WEEK PHOTO SHOOT
TESTS
Monday, February 11, 2008
Architecture Project
P.S. I HAVE JUST BEEN NOTIFIED THAT WE WILL BE HAVING A PEP RALLY DURING 2ND PERIOD ON FRIDAY, SO THERE WILL BE NO CLASS. THEREFORE, I WILL GIVE YOU TIME TODAY (WEDNESDAY) TO COMPLETE AND TURN IN YOUR ARCHITECTURE PROJECT. YOUR PROJECT WILL BE LATE AFTER THURSDAY, FEBRUARY 14TH.
Thursday, February 7, 2008
Quiz
Wednesday, February 6, 2008
Presentations/Quiz
Monday, February 4, 2008
Architectural Photo Shoot
http://photo.net/learn/architectural/exterior
Photographer Research Project
Friday, February 1, 2008
David Hockney Camera Obscura Controversy
http://www.artrenewal.org/articles/2004/Hockney/yoder1.asp
http://www.artrenewal.org/articles/2004/Massey/hockney1.asp
http://www.persiancarpetguide.com/RugNotes/David_G_Stork/Hockney_Falco_Stork_controversy.htm
http://www.pbs.org/wnet/americanmasters/database/hockney_d.html
http://www.cbsnews.com/stories/2003/01/16/60minutes/main536814.shtml
http://www.stanfordalumni.org/news/magazine/2003/novdec/features/artoptics.html
http://en.wikipedia.org/wiki/Hockney-Falco_thesis
http://news.rpi.edu/campusnews/update.do?artcenterkey=1777&setappvar=page(1)&setappvar=pos(last)&setappvar=issueSet(1772,1777,1776,1770,1781,1778,1779,1773)
http://www.optics.arizona.edu/SSD/FAQ.html
http://findarticles.com/p/articles/mi_qn4158/is_20051001/ai_n15647244
Tuesday, January 29, 2008
Research Project
History of Photography Research Project
· Select photographer and research using books and Internet (no Wikipedia)
· Every student must select a different photographer
· Research and take notes; Use the handout to record quotes and sources
· You should cover the following information:
o Birth and death
o When and where he/she worked
o What type of photography
o What was interesting or unique about the work
o Personal information
o Training, if any
o Importance to the field of photography
· Include one or two photos of your photographer
· Include a minimum of six photographs typical of the photographer’s work
· Use the storyboards provided in class as a written guide to develop your PowerPoint presentation
· Storyboards must be approved before beginning PowerPoint
· There must be a minimum of ten slides (not including Title Page and Bibliography)
· Quotes used in your presentation must be attributed to the source
· The Title Page should give the photographer’s name, your name, the class, and the date
· A Bibliography slide must go at the end of the presentation—Tell where you got your information and photographs!
· Write captions about each of your photographer’s photos giving a brief description and any historical significance
· Proofread your presentation! Spelling counts!
· Save as.. using your class number and “Photographer Research Project”
· Print a handout—points off if not printed according to these instructions:
Go to print>handout>6 per page
· Turn in handout, storyboard, research notes, and grading sheet (with your name and class number) as you present to the class
· Give an oral presentation with your PowerPoint
· Make sure you are familiar enough with the life of your photographer that you can answer questions from the class
· Pay attention and take notes as others present! You will need to know about all these photographers for the History of Photography Test!
Monday, January 28, 2008
History of Photography
You should be experimenting with your new cameras and taking lots of pictures. We will start with PhotoShop soon, and you'll want to have plenty of shots to use for practice! Remember, you can save as many photos as you like to the 'N' drive. This is where you should store everything you do in Photography Class. As a theme, go for "Bold and Colorful" photos!
Friday, January 25, 2008
Parent Letter (copy of the letter you signed)
I would like to welcome you and your child to our class. Photography can be a rewarding hobby or career. However, your child should not dismiss this as an easy course. I have high expectations for my students, and they should be prepared to work as hard here as they do in any other academic classroom. Students will be assigned many projects. They will develop a creative eye for taking a good photograph, and will learn artistic editing with PhotoShop software. Projects will be graded on creativity, technical skill, and the degree of effort put forth. Students will also be required to prepare at least one research paper, as well as a final portfolio.
Your child will need a suitable camera for creating good images in this class. Entry level or mid-range cameras will be fine. The recommended digital camera for this class will have at least a 3-4 mega pixel image and 3x optical zoom. Cameras of a lesser quality may not give the desired results, resulting in frustration for your child.
Students will be responsible for all assignments regardless of any difficulties they may encounter with their cameras. If necessary, disposable cameras can be purchased for short-term use so as not to get behind on projects. Film can then be developed and pictures put on cd, before bringing to school to edit.
Students should bring their camera each day to class, unless otherwise advised. They should also bring their own cable for direct camera-to-computer connection and/or a memory card reader. Every effort will be made to protect cameras brought to school; however, we can not be responsible for theft or damage to cameras during school hours. Since students will each have a different model camera, they should read over their individual User Manuals and be familiar with the basic operation of their own camera prior to class.
Because of the expense of printing, most assignments will be turned in digitally and graded in the same manner. Students may be allowed to print certain special projects, but they are responsible for providing their own photographic printer paper. It is suggested that students also have a USB flash drive for safe storage of their work. Students should retain copies of all projects to be used in their final portfolio.
As a rule, the only homework students will be assigned will be taking pictures. They will have several days notice before a due date. They are required to take pictures after school and on weekends, off campus. I am asking that you help your child get assignments done on time. By keeping on schedule, I can better monitor student progress, and submission of last-minute, poorer quality work can be avoided. The only acceptable excuse for photos being late is if a student has an excused absence on the due date, in which case the assignment is due immediately upon student’s return to school. If a picture-taking assignment is turned in late for any other reason, the student will receive a zero for the deadline grade. Late projects will lose one letter grade, and will only be accepted up to one week following the original deadline. I have created a class web site where deadlines will be posted: http://ffh.dare.k12.nc.us/teacher/lisafinch/index.shtml. You may also reach this site by following the Fine Arts link from the FFHS main page. Please check the site regularly for important information.
I sometimes post students’ project grades on the web site as well, identifiable only by ID numbers—not names. I believe this practice is motivational for the students, and gives parents some insight as to their child’s progress prior to interims. With your permission, I will include your child’s grades.
It is occasionally advantageous for the class to leave campus to take pictures during our class period, with my supervision. I’d also like your permission for your child to join us on these short field trips, within walking distance of the school, whenever necessary.
Finally, your child will be asked to sign the FFHS honor pledge that all photographs submitted for a grade will have been taken by the student during the time he/she is enrolled in this photography class. If a student violates this rule, he/she will receive a zero for the assignment and will be referred to Administration. Student projects become the property of First Flight High School, and we reserve the right to publish or display them.
By signing and returning this page, you are acknowledging receipt of this parent letter and giving permission as outlined herein.
If you have any questions or concerns at all, please feel free to telephone me at FFHS (449-7000 ext.2459) or email me at finchli@dare.k12.nc.us. I look forward to an exciting school year in Basic Photography class!
Sincerely,
Lisa Finch
Syllabus
Photography I
Lisa Finch, Instructor
finchli@dare.k12.nc.us 449-7000 ext.2459
Course Description: This course is designed to acquaint students with general digital photography. It will explore history, applications, and techniques of photography. Students will be required to do research, use basic skills, and show knowledge of photography by creating and manipulating black and white and color images.
Requirements: Students must have their own digital or traditional still camera. While a digital camera is not required, students using a 35mm assume responsibility for converting their negatives to digital media and meeting all assignment deadlines. They must also supply their own film, processing, and cdr’s. Students with digital cameras must have their own USB cable and an ample supply of batteries. They may also wish to have a card reader or photographic paper, but these items are optional. Assignments will be created and submitted electronically. Printing will be limited to a few special assignments.
Specific Competencies: Students will learn to shoot and prepare images for digital reproduction. Students will do independent research in a chosen area of photography. Students will demonstrate basic competency in composition and photographic preparation. Students will be able to identify and use 35mm SLR and digital cameras. Students will learn to design various graphics for digital imaging.
Course Evaluation: Grades will be determined using the following criteria:
Tests/Quizzes…………………………………………….15%
Participation……………………………..…….………….15%
Deadlines…………………………………………...………10%
Projects……………………………………………...………60%
Tests/Quizzes: Tests will be given at regular intervals. Content will be reviewed before each test. Open note quizzes will be given to assess students’ understanding of reading assignments and class discussions. Quizzes are unannounced and can not be made up. Students are encouraged to be prepared by bringing all notes and handouts to class each day, along with pencil and paper.
Participation: History, background information, and art criticism will be addressed each week through various discussions and assignments. Students are expected to actively participate in discussions and make good use of class time while completing assignments. Daily participation grades will be assigned based upon these criteria. Up to 20 points per day are earned if student uses his/her class time wisely.
Deadlines: In order to complete lessons, assignments, and projects, students are required to take photographs outside of class, off campus. Generally, that will be the only homework assignment. It is essential that students are prepared. When due dates are met student will receive 100% for deadline grade. This applies to both projects and homework photos. If a deadline is not met, student receives a zero. When a project is not turned in on time, student will be given a period of one week to submit it with a letter grade deduction. After that, the project is an F. In any case, the deadline grade of zero will stand. It is the student’s responsibility to keep up with deadline dates, which will always be posted on the class web page.
Projects: The bulk of the grade for this class will be for photographic projects. Students will be assessed on creativity, technical skill, and effort. There will also be at least one research project which will include an oral presentation. Digital sketchbooks will be maintained by students, which will include a variety of still images on assigned subject matter. A final portfolio presentation will be assembled from students’ copies of photographs from the various projects. Student is responsible for keeping a copy of all work. It is suggested that students have a USB flash drive for safe storage of photographs.
The standard grading scale will be used:
A=93-100, B=85-92, C=77-84, D=70-76, F=0-69
Thursday, January 24, 2008
Who's Who Project
Wednesday, January 23, 2008
WELCOME!!!
Monday, January 14, 2008
Study for Exams
Here are some things you should go over:
Know about the photographer you presented to the class.
Know about at least one other photographer we studied (from reading, films, or other presentations).
Know the basics about 35mm photography.
Know how to get the proper exposure.
Know about action photography and how to get blurred action and stopped action shots.
Know about composition. Read over your research paper on the topic!
Know when and when NOT to use the 'automatic' setting on your camera.
Read over our early worksheets and hand-outs.
Know PhotoShop! Know where to find all the tools. Go over the PhotoShop handouts if you are unsure. Be able to straighten horizons, fix red-eye, improve focus problems, do simple facial retouching (erase pimples, whiten teeth, replace color in eyes, etc.), use text features, use filters, remove color casts, create frames.
Understand terms like Bits, Bytes, Pixels, dpi, ppi, Histogram, Hue/Saturation, Noise, Resolution, RGB, JPEG, Exposure, F-Stop, Aperture, Point-of-View, Composition, Shutter Speed, Exposure, Dodge, Burn, Redeye, etc.
EXAM EXEMPTIONS
21, 24, 26, 27, 29, 216, 217, 218
PLEASE NOTE: An additional tardy or absence could change your exemption status!
Tuesday, January 8, 2008
NHIs
Backlit (same close-up backlit shot with and without flash, side by side & contact sheet/12)--28, 216
Backlit Landscape (contact sheet/12, 6 edited, best final photo):28
Before and After Portrait Retouch (contact sheet/12, 4 before shots side by side with the same 4 portraits after retouch):28
Macro (contact sheet/12, 6 edited, best final photo):28
Classwork Collage (collage combining several images--any subject):28
Family/Relationship Themed Collage (contact sheet/12, collage containing elements from at least four photos): 28
Action Project (contact sheet/12, contact sheet of 4 including stop action, panning, blurred action, and a poster): 24, 212, 214
Metaphor Self-Portrait (contact sheet/12, 6 edited, best final of still life that represents you): 24
Montage (created artwork with several mounted photos on a background): 213
I have not yet graded Hockney, but you know whether or not you've turned that in. Your Final Portfolio Project will also be included.
Thursday, January 3, 2008
Final Portfolio Project
Format: PowerPoint
Criteria: Students will produce a 22 slide PowerPoint presentation highlighting their best work in Digital Photography I. It will include a title slide and a final slide containing an honor statement as well as the following photos:
1)Architecture or Architectural Detail—man-made, permanent structure should be the primary focus
2)Landscape, Student’s choice (“calendar shot”—the goal is beauty)
3)Black and White of Student’s choice
4)Macro photo
5)Nature shot
6)Candid photo of school life
7)Posed Portrait, retouched as necessary
8)Student’s best collage
9)A Montage
10)Photo which shows action/movement
11)Backlit close-up photo (with or without flash)
12)Backlit Landscape
13)Family/Relationship-themed collage
14)Unique photo showing creativity—student’s choice of subject matter
15)Still Life photo of food/beverage
16)Student’s choice of photo showing use of a creative filter
17)A Vignette
18)Metaphor Self-Portrait Still Life (not a collage!)
19)Field Trip photo (Wright Memorial or Butterfly Garden)
20)Created artwork showing student’s best use of PhotoShop tools on a photo/photos
Title and end slide should show similar design features. End slide will be the honor code stipulating that you took all photos personally and during this semester. Use transitions and animation on your slides, but do not automate your slide show.
Note: A PhotoShop canvas size of 10 inches wide by 7.5 inches high is the equivalent of a PowerPoint slide. Each photo will be graded individually on effort, creativity, imagination, and technical skills. Do not submit photos with serious photographic errors such as red eyes, out-of-focus, underexposed or overexposed, etc. Put slides in order! You may add titles if you wish, but it is not required. If you add titles, make sure they are an enhancement, not distraction! You will give an oral presentation with your slide show. Be prepared to elaborate on how you created each piece, and answer questions. This project will count 1 1/2 times a normal project grade. Do a good job!
Each photo will be graded individually as follows:
Zero-Not submitted or Does not meet criteria of assignment
3.5 points--Below average; Shows minimal effort and lack of pride in finished product; Shows little creativity or technical skill
4 points--Average; Adequate interpretation of assignment, but could have been improved with more effort; Shows average level of creativity and technical skill
5 points--Above average; Shows high degree of imagination, effort and technical skill; Went beyond assignment’s requirements with pride in finished product
Welcome Back!!
Your contact sheet/12 Hockney photos is due today. Open each photo, crop if necessary, adjust brightness/contrast and levels. Choose the best ones to include in your collage. Print several contact sheets. You will use the small photos in your collage. Adjust the number of photos on the contact sheets to control the size of your pictures. You may choose black and white or color. Begin work on your collage, which will be arranged on 18"x24" newsprint paper. ONE NEWSPRINT PAGE PER STUDENT, SO DON'T MESS UP!! Get my approval before gluing it all down!! Final will be due tomorrow.
If you need to refresh your memory about Hockney, do so following the links in the previous posts.