I wanted to give you an opportunity to take care of any missing projects before interims go out next week. Please keep in mind that I show NHI until ALL pieces of the project have been submitted. You may still turn these projects in until 5 p.m. Monday, December 3rd.
As of 5 p.m. on Thursday, November 29th, I am showing the following NHIs:
Backlit (same close-up backlit shot with and without flash, side by side & contact sheet/12)--
24, 27, 28, 210, 212, 214, 216
Backlit Landscape (contact sheet/12, 6 edited, best final photo):
24, 28, 210, 214
Before and After Portrait Retouch (contact sheet/12, 4 before shots side by side with the same 4 portraits after retouch):
24, 28, 213
Macro (contact sheet/12, 6 edited, best final photo):
28, 210, 213, 214
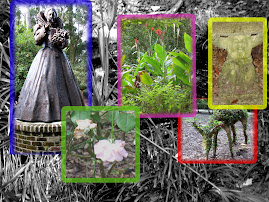
Classwork Collage (collage combining several images--any subject):
28, 213
Family/Relationship Themed Collage (contact sheet/12, collage containing elements from at least four photos):
23, 28, 212, 213, 214
Thursday, November 29, 2007
IMPORTANT!!! TURNING IN FUTURE WORK FOR A GRADE
Beginning Monday, December 3rd, with the Action Project, all completed work will be submitted to the "1AAA COMPLETED ASSIGNMENTS" folder that is within your own folder on the 'N' drive. Do NOT change the title of this folder---It is the ONLY place I will look for your projects to grade. Do NOT clutter this folder up with other things except work that is finished and ready for grading. You will continue to use your identification number, but you will no longer use the shared folder. In addition, you will have seven days ONLY to turn in a project late. After that, it is NHI (zero)--no exceptions! I will accept late work for this grading period until December 3rd as a help to some of you who would otherwise have several NHIs (and a failing grade) on your interims. As you know, PhotoShop automatically records the date and time that any photo is saved, so there will be no question as to whether a project was submitted on time. I hope this system will work better for those of you who are having difficulty in this class.
Wednesday, November 28, 2007
What is CRITIQUE????
Critique \Cri*tique"\, v. t. [Cf. Critic, v.] To criticise or pass judgment upon. [Obs.] --Pope.
Critique \Cri*tique"\ (kr?-t?k"), n. [F. critique, f., fr. Gr. ???? (sc. ????) the critical art, from ?????. See Critic.] 1. The art of criticism. [Written also critic.] [R.] 2. A critical examination or estimate of a work of literature or art; a critical dissertation or essay; a careful and through analysis of any subject; a criticism; as, Kant's "Critique of Pure Reason.''
Here’s an excerpt from an article that I found interesting on the topic:
The Photographic Critique as a Learning Experience
by Joseph Meehan
Although the word “critique” is rooted in the concept of criticism (“a judgment of what is wrong”), a successful photographic critique should result in a positive outcome for the photographer. That is, the experience should help the photographer better understand how his or her work is being perceived as a basis for improvement. This typically begins with the reviewer reacting to how well the overall visual message is stated. In doing so a professional reviewer is expected to remain objective while identifying the specific strengths and weaknesses of a photograph. It is not very useful, for example, to simply say they like or dislike a particular image without explaining why.
On the other hand, the photographer needs to approach this process with the proper motivation and attitude. Most importantly, to understand that the work is being evaluated in terms of how it appears to the professional conducting the critique. If there is a disconnection between the impressions of the reviewer and what the photographer intended, then something is obviously wrong. Identifying why the message was not clearly perceived should be balanced with an emphasis on how things can be done better or even to identify missed opportunities.
See the full article with examples at:
http://www.photoworkshop.com/critiquing
Definition of the different types of critique:
www.scphotogs.com/articles/critique.pdf
Please pay special attention to the portion about ‘Peer Review”, which is what we are doing when we critique photos in class (pp. 5-7).
Peer Review
What it is:
A peer review is one of the most common forms of critique available. As peers, this means that the photographer is receiving a critique from other photographers. A peer review means that your feedback is no longer just Aunt Betty seeing a sunset shot and saying “Nice.” It consists of a peer that can consciously recognize the smoothness of the water, the sharpness (or lack thereof) throughout the image, as well as changes in color tones and contrast.
Since fellow photographers are more aware of these technical merits, they can actually comment on them with a certain degree of “expertise”. These are typically the types of critiques one will see requested and given in photo communities like www.photo.net, www.fredmiranda.com, www.dpreview.com. The very nature of these communities is that they serve as a venue to present and share images with your peers, as well as to give and receive useful critiques and analyses of your imagery.
What it is good for:
Peer review is typically good for individuals who would like some objective analysis and feedback on what is good about their imagery, including times where there are areas that could use improvement. It takes a tougher skin to accept reviews of this nature, because you may get feedback that points out flaws either in your technique, style, equipment, or any combination of these. So, be forewarned, if you ask for a peer review; be prepared to perhaps hear things you wouldn’t get from Aunt Betty or your sister, Mary.
Expectations
Since this is a peer review, the typical expectation is that the reviewer will give their thoughts on some of the technical aspects of the image as presented. Likewise, for the one receiving feedback, you likely are not going to get the typical sunshine and glowing responses that you get from Aunt Betty and your sister Mary. These reviews will likely include comments such as “I like the composition here, but it looks like your horizon isn’t straight. You may want to fix that.”
So, what technical aspects can the submitter expect to get critiqued on? This varies, depending on the skill, experience, and breadth of knowledge on the part of the reviewer. In general though, there are 7 key areas that people look at when critiquing photographs on their technical merit:
1.
Depth of Field (DOF) and Focus – Often confused with sharpness, DOF and focus speak to the entire image, rather the main subject. Depth of field considers the impact of blur and sharpness throughout the image. Questions often considered include: Is the entire image in focus or are some parts blurred or out of focus? Is it blurred only in a particular region of the image (foreground, middle ground or background)? How does the DOF impact the subject? Does the blurring of the foreground and/or background help or detract from the image?
2.
Exposure – Are there any areas of the image that are completely black (no shadow detail) or white (no highlight detail)? Does this help or detract from the image?
3.
Lighting – What type of lighting exists? Is it soft even lighting, or harsh spot lighting? In either case, does it produce a visually appealing or stimulating result? Does that result help or detract from the image?
4.
Sharpness – Often confused with depth of field and focus, this factor looks specifically at the subject of the image. Is it slightly out of focus( soft), completely out of focus (usually as a result of camera or motion blur), or spot on (tack sharp for the entire subject matter)? Is the effect (soft, blurred, or spot on) intentional, and if so, does it enhance or detract from the image?
5.
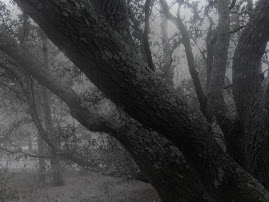
Lines – Are lines present and/or are they used effectively within the image? Lines are used in photography to guide the viewer through an image. Lines can take several forms in photographs. Curving landscape, the arrows of an bird’s feathers, the rippling circles of a water drop, the repeating pattern of bark on a tree, the random meanderings of vines across a wall, the veins of a leaf, the bold architectural lines or a church steeple or suspension bridge, and even abstract lines of blurred grass in the wind are all examples of how lines can be powerful anchors to an image that stimulate and direct the viewer to and through points of interest in a picture. Their presence or absence and effective placement can make or break an image.
6.
Color – Are colors accurate, vibrant, or non-existent? If the skin tone is off or not corrected during post-processing, this can decrease the appeal and quality of an image in the eyes of a reviewer. Likewise, if colors are flat or subdued, depending on the nature of the image this can either enhance or detract from overall image quality. Finally, lack of color can also have a very powerful impact on images. The notoriety and recognition that one of photography’s most famous, Ansel Adams, and his presentations of black and white imagery is still seen today in the work of people that strive toward those particular ends.
7.
Composition/Originality – When critiquing photographs, some basic rules of composition can be used to measure the overall appeal. One of the most famous, the Rule of Thirds (ROT), is often applied to determine whether the composition of an image is “on” or “off”. Often times, images may not adhere to the ROT principle by intent, to produce a new and original perspective. Since the composition and originality of an image is often subjective by nature, it can be difficult to quantitatively measure this. Nevertheless, the composition of an image is probably the fundamental cornerstone upon which imagery is presented. If the composition is not there, it does not matter whether the colors are accurate, sharpness is present, with beautiful even lighting, or depth of field is effective. The image will likely not be received well if it does not stimulate or engage the viewer on some level.
Generally, peer reviews will usually address one or more of the above technical merits, as well as offer general feedback. Commentary can vary wildly depending on the familiarity level the reviewer and the submitter have with one another, the type of community, and how it’s presented. (Is it done by means of an email, private message, or other one-on-one communication, or is it done in an open community where everyone can read the review?)
What it is not good for:
Peer review is generally not good for images presented outside the parameters of a peer review area. Typically photo communities like the ones mentioned above, or groups and gatherings of photographers in an organization (like regional clubs that meet regularly to share and critique each others works) are where peer reviews are done. If someone has images on a web log, or on a website as a gallery, this is not the venue for conducting peer reviews. From a reviewer’s perspective, this is also not the place to leave generic and/or non-specific commentary. Usually responses like “Nice”, “overblown” or “I like this” will not be of much help because there is nothing specific that the submitter is getting back that either they need to work on, or that they know they are doing correctly.
For a tutorial on Professional Photographic Critique:
http://tips.romanzolin.com/articles/article004.php
Another, on Professional Critique:
http://www.naturephotographers.net/je1001-1.html
Important Excerpts—Goals toward writing an effective critique:
Start off by taking some time to truly study the image and form an opinion of what appeals to you about the image, both technically and aesthically. Sometimes coming back to study the image again a short time later is helpful.
After forming an overall impression of the image, begin to identify the specific technical qualities of the image (lighting, color, contrast, composition, depth-of-field, background, etc.) that appeal or don't appeal to you. In just about any image, you can find both. Do the same with the aesthetic qualities of the image by describing any emotional response the image imparts. It's not uncommon to find images that are technically deficient, but yet impart a strong emotional response from the viewer, and visa versa. Feedback to the photographer on both the technical and aesthetic aspects of an image is useful.
Search for the words and phrases that most effectively convey your thoughts about these specific qualities.
Begin the written critique with what you like about the image. It is a mistaken belief that a photo critique should only point out what is wrong. In fact, as much can be gained by pointing out what it is that appeals to the viewer.
Out of the image qualities that you feel need improvement, pick those qualities that you can most effectively communicate why you think they need improvement, and how an improvement of those qualities would help improve the image.
Whenever possible, offer suggestions based on first-hand experience on how to improve those image qualities that you found lacking.
Critique \Cri*tique"\ (kr?-t?k"), n. [F. critique, f., fr. Gr. ???? (sc. ????) the critical art, from ?????. See Critic.] 1. The art of criticism. [Written also critic.] [R.] 2. A critical examination or estimate of a work of literature or art; a critical dissertation or essay; a careful and through analysis of any subject; a criticism; as, Kant's "Critique of Pure Reason.''
Here’s an excerpt from an article that I found interesting on the topic:
The Photographic Critique as a Learning Experience
by Joseph Meehan
Although the word “critique” is rooted in the concept of criticism (“a judgment of what is wrong”), a successful photographic critique should result in a positive outcome for the photographer. That is, the experience should help the photographer better understand how his or her work is being perceived as a basis for improvement. This typically begins with the reviewer reacting to how well the overall visual message is stated. In doing so a professional reviewer is expected to remain objective while identifying the specific strengths and weaknesses of a photograph. It is not very useful, for example, to simply say they like or dislike a particular image without explaining why.
On the other hand, the photographer needs to approach this process with the proper motivation and attitude. Most importantly, to understand that the work is being evaluated in terms of how it appears to the professional conducting the critique. If there is a disconnection between the impressions of the reviewer and what the photographer intended, then something is obviously wrong. Identifying why the message was not clearly perceived should be balanced with an emphasis on how things can be done better or even to identify missed opportunities.
See the full article with examples at:
http://www.photoworkshop.com/critiquing
Definition of the different types of critique:
www.scphotogs.com/articles/critique.pdf
Please pay special attention to the portion about ‘Peer Review”, which is what we are doing when we critique photos in class (pp. 5-7).
Peer Review
What it is:
A peer review is one of the most common forms of critique available. As peers, this means that the photographer is receiving a critique from other photographers. A peer review means that your feedback is no longer just Aunt Betty seeing a sunset shot and saying “Nice.” It consists of a peer that can consciously recognize the smoothness of the water, the sharpness (or lack thereof) throughout the image, as well as changes in color tones and contrast.
Since fellow photographers are more aware of these technical merits, they can actually comment on them with a certain degree of “expertise”. These are typically the types of critiques one will see requested and given in photo communities like www.photo.net, www.fredmiranda.com, www.dpreview.com. The very nature of these communities is that they serve as a venue to present and share images with your peers, as well as to give and receive useful critiques and analyses of your imagery.
What it is good for:
Peer review is typically good for individuals who would like some objective analysis and feedback on what is good about their imagery, including times where there are areas that could use improvement. It takes a tougher skin to accept reviews of this nature, because you may get feedback that points out flaws either in your technique, style, equipment, or any combination of these. So, be forewarned, if you ask for a peer review; be prepared to perhaps hear things you wouldn’t get from Aunt Betty or your sister, Mary.
Expectations
Since this is a peer review, the typical expectation is that the reviewer will give their thoughts on some of the technical aspects of the image as presented. Likewise, for the one receiving feedback, you likely are not going to get the typical sunshine and glowing responses that you get from Aunt Betty and your sister Mary. These reviews will likely include comments such as “I like the composition here, but it looks like your horizon isn’t straight. You may want to fix that.”
So, what technical aspects can the submitter expect to get critiqued on? This varies, depending on the skill, experience, and breadth of knowledge on the part of the reviewer. In general though, there are 7 key areas that people look at when critiquing photographs on their technical merit:
1.
Depth of Field (DOF) and Focus – Often confused with sharpness, DOF and focus speak to the entire image, rather the main subject. Depth of field considers the impact of blur and sharpness throughout the image. Questions often considered include: Is the entire image in focus or are some parts blurred or out of focus? Is it blurred only in a particular region of the image (foreground, middle ground or background)? How does the DOF impact the subject? Does the blurring of the foreground and/or background help or detract from the image?
2.
Exposure – Are there any areas of the image that are completely black (no shadow detail) or white (no highlight detail)? Does this help or detract from the image?
3.
Lighting – What type of lighting exists? Is it soft even lighting, or harsh spot lighting? In either case, does it produce a visually appealing or stimulating result? Does that result help or detract from the image?
4.
Sharpness – Often confused with depth of field and focus, this factor looks specifically at the subject of the image. Is it slightly out of focus( soft), completely out of focus (usually as a result of camera or motion blur), or spot on (tack sharp for the entire subject matter)? Is the effect (soft, blurred, or spot on) intentional, and if so, does it enhance or detract from the image?
5.
Lines – Are lines present and/or are they used effectively within the image? Lines are used in photography to guide the viewer through an image. Lines can take several forms in photographs. Curving landscape, the arrows of an bird’s feathers, the rippling circles of a water drop, the repeating pattern of bark on a tree, the random meanderings of vines across a wall, the veins of a leaf, the bold architectural lines or a church steeple or suspension bridge, and even abstract lines of blurred grass in the wind are all examples of how lines can be powerful anchors to an image that stimulate and direct the viewer to and through points of interest in a picture. Their presence or absence and effective placement can make or break an image.
6.
Color – Are colors accurate, vibrant, or non-existent? If the skin tone is off or not corrected during post-processing, this can decrease the appeal and quality of an image in the eyes of a reviewer. Likewise, if colors are flat or subdued, depending on the nature of the image this can either enhance or detract from overall image quality. Finally, lack of color can also have a very powerful impact on images. The notoriety and recognition that one of photography’s most famous, Ansel Adams, and his presentations of black and white imagery is still seen today in the work of people that strive toward those particular ends.
7.
Composition/Originality – When critiquing photographs, some basic rules of composition can be used to measure the overall appeal. One of the most famous, the Rule of Thirds (ROT), is often applied to determine whether the composition of an image is “on” or “off”. Often times, images may not adhere to the ROT principle by intent, to produce a new and original perspective. Since the composition and originality of an image is often subjective by nature, it can be difficult to quantitatively measure this. Nevertheless, the composition of an image is probably the fundamental cornerstone upon which imagery is presented. If the composition is not there, it does not matter whether the colors are accurate, sharpness is present, with beautiful even lighting, or depth of field is effective. The image will likely not be received well if it does not stimulate or engage the viewer on some level.
Generally, peer reviews will usually address one or more of the above technical merits, as well as offer general feedback. Commentary can vary wildly depending on the familiarity level the reviewer and the submitter have with one another, the type of community, and how it’s presented. (Is it done by means of an email, private message, or other one-on-one communication, or is it done in an open community where everyone can read the review?)
What it is not good for:
Peer review is generally not good for images presented outside the parameters of a peer review area. Typically photo communities like the ones mentioned above, or groups and gatherings of photographers in an organization (like regional clubs that meet regularly to share and critique each others works) are where peer reviews are done. If someone has images on a web log, or on a website as a gallery, this is not the venue for conducting peer reviews. From a reviewer’s perspective, this is also not the place to leave generic and/or non-specific commentary. Usually responses like “Nice”, “overblown” or “I like this” will not be of much help because there is nothing specific that the submitter is getting back that either they need to work on, or that they know they are doing correctly.
For a tutorial on Professional Photographic Critique:
http://tips.romanzolin.com/articles/article004.php
Another, on Professional Critique:
http://www.naturephotographers.net/je1001-1.html
Important Excerpts—Goals toward writing an effective critique:
Start off by taking some time to truly study the image and form an opinion of what appeals to you about the image, both technically and aesthically. Sometimes coming back to study the image again a short time later is helpful.
After forming an overall impression of the image, begin to identify the specific technical qualities of the image (lighting, color, contrast, composition, depth-of-field, background, etc.) that appeal or don't appeal to you. In just about any image, you can find both. Do the same with the aesthetic qualities of the image by describing any emotional response the image imparts. It's not uncommon to find images that are technically deficient, but yet impart a strong emotional response from the viewer, and visa versa. Feedback to the photographer on both the technical and aesthetic aspects of an image is useful.
Search for the words and phrases that most effectively convey your thoughts about these specific qualities.
Begin the written critique with what you like about the image. It is a mistaken belief that a photo critique should only point out what is wrong. In fact, as much can be gained by pointing out what it is that appeals to the viewer.
Out of the image qualities that you feel need improvement, pick those qualities that you can most effectively communicate why you think they need improvement, and how an improvement of those qualities would help improve the image.
Whenever possible, offer suggestions based on first-hand experience on how to improve those image qualities that you found lacking.
Tuesday, November 27, 2007
Action/Sports Photography
Our next photo shoot will involve sports photography. You should take action photos---stop action, blurred action, and panning. Please take LOTS of pictures (minimum 35-40). Many of them will not come out! You should have several of each type by MONDAY, DECEMBER 3RD, DEADLINE FOR CONTACT SHEETS. You'll make a contact sheet showing 4 photos of each type---12 total. Save it to the folder entitled '1AAA COMPLETED ASSIGNMENTS' within your own folder on the 'N' drive by the end of class Monday. I will not look for it any other place.
The final project will be to turn in the best edited 'freeze action', best edited 'blurred action', and best edited 'panning' shots, as well as a sports shot using text to make a poster. You will place the four photos on one sheet. This page will be due at the end of class on Thursday, DECEMBER 6TH. Save to your '1AAA COMPLETED ASSIGNMENTS' folder. Print the page to our new color printer in the computer lab, and turn in the hard copy. THE LAST DAY THIS PROJECT WILL BE ACCEPTED LATE, WITH A LETTER GRADE DEDUCTION, WILL BE DECEMBER 13TH.
Here are some sites to help you better understand what makes a good action shot.
Professional Photographers who specialize in Action Photography:
http://www.padulaphotography.com/
http://www.actionsportsinc.com/eventdisplay.aspx?is=9
http://www.actionathletics.com/
http://www.actionsportsphotography.sasktelwebsite.net/
http://www.actionsportspress.com/
http://www.greggriess.com/action_main.htm
‘How to’ Sites:
http://photo.net/learn/sports/overview
http://www.popphoto.com/popularphotographyfeatures/4016/how-to-photograph-baseball-and-softball.html
http://www.nyip.com/ezine/sports/golf.html
http://www.squidoo.com/action-photography/
http://www.nyip.com/ezine/sports/football.html
http://www.popphoto.com/popularphotographyfeatures/4334/how-to-show-an-action-sequence.html
http://www.schoolofphotography.com/if/infocus22.html
Required Reading:
http://www.diynetwork.com/diy/shows_dtwp/episode/0,2499,DIY_23301_40578,00.html
http://www.diynetwork.com/diy/hp_digital_photography/article/0,2033,DIY_13956_4228109,00.html
http://www.diynetwork.com/diy/hp_techniques/article/0,2033,DIY_13958_2270940,00.html
http://www.diynetwork.com/diy/hp_digital_photography/article/0,2033,DIY_13956_4228109,00.html
http://www.diynetwork.com/diy/hp_digital_photography/article/0,2033,DIY_13956_4228155,00.html
Monday, November 19, 2007
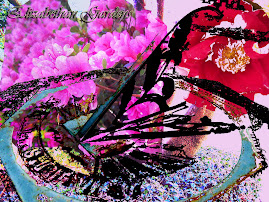
Collages/Thanksgiving assignment
This short week you should first turn in anything you are missing, then practice techniques for making collages. I have demonstrated it for you on the big screen in class, but if you have any further questions, please do not hesitate to call me over. Don't forget to alter the opacity, and you can apply different filters to each layer. Do not flatten layers until you have finished. You may also use text if you wish. Make sure all photos have something in common. Good collages tell a story. The key is to combine objects of different scale. Pair distance shots up with macros. Use full body shots together with close-up facial pics. Do your best on this practice collage, and turn in Tuesday. It will be graded as classwork. We will do a collage project when we return from Thanksgiving. This one will be for a full project grade. Your topic is family/relataionships. Take all photos over the holiday. Contact Sheet of 12 due 11-26. Final Family/Relationship Collage using elements from a minumum of four photos will be due THURSDAY, NOVEMBER 29TH! I will only grade those projects that have both pieces---a contact sheet AND a collage containing elements of at least four photos. LAST DAY TO TURN IN LATE WITH LETTER GRADE DEDUCTION IS THURSDAY, DEC. 6TH.
Thursday, November 15, 2007
Photography Contest
Students, I was asked to pass this along to you: (LF)
Hi
Sandy Semans sent this to me to forward to ya'll - this could make a great project, or something for kids to do on their own.
Thanks, and enjoy your day.
sharon
>Dear Refuge Supporter:
>
>This year, for the first time, the 2008 Refuge Photography Contest is
>accepting entries from youth! If you know a photographer under the age of
>18, direct them to the attached flyer and NWRA's site, www.refugenet.org,
>for details on how they can enter for a chance to win.
>
>How to Enter:
>
>1. Select either the Senior Youth category, ages 14-17, or the Junior Youth
>Category, ages 13 and below.
>
>2. Choose up to 10 photographs taken on a National Wildlife Refuge within
>the past three years.
>
>3. Submit your image(s) online at www.refugenet.org before December 15,
>2007.
>
>Five top winners in each category will receive a prize and the chance to
>have their image appear in future NWRA publications! Go to
>www.refugenet.org and click on "2008 Refuge Photography Contest" to learn
>more. If you have any questions, please contact Claire Stoker at
>cstoker@refugenet.org or (202)333-9075, ext.25.
>
>Thank you.
>
>--
>National Wildlife Refuge Association
>1901 Pennsylvania Avenue NW, Suite 407
>Washington, D.C. 20006
>Ph. 202-333-9075
>
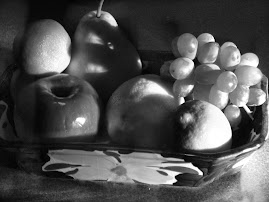
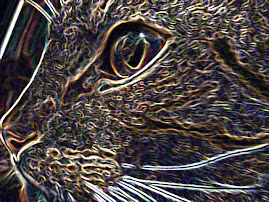
Macro--second chance!
I was searching for some really good macros to put on channel 19, but I was disappointed that I found very few. So many of the macros students turned in were out of focus! That is automatically a failing grade. Please do not EVER turn in a photo where the main subject is not in clear focus!!! Also, I saw many shots on the contact sheets that I thought were better than what was submitted as the best photo. I want to give you a second chance to get a good grade on this project.
I'm asking all my classes to resubmit a macro photo. It does not have to be from the macro project. It can be from any photo shoot as long as it was taken by you this semester. I have placed a folder on the shared drive for this submission. Label this one with your full name so you can get credit for it if yours is selected for tv!
When I grade the macros, I will choose your better shot--either the one you originally submitted or the new one. I will grade whichever one will give you the highest grade on this project.
Tuesday, November 13, 2007
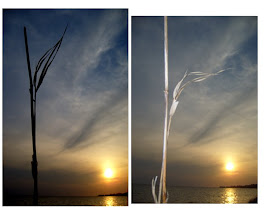
Next Photo Shoot...
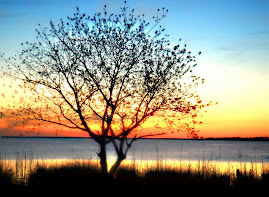
...backlit landscapes! We all know what a backlit photo is now. We have taken some backlit close-ups. Now we will take backlit landscapes---sunrises, sunsets, anytime you're shooting INTO the sun. Avoid flares! Think calendar shots--buildings or people should be incidental, not the main focus. The OBX has some beautiful scenery and outstanding sunsets! These should be great! You should have your photos ready for the contact sheet by Monday, November 19th.
Wednesday field trip
As you know, we will be without a classroom again on Wednesday due to testing. I am planning another field trip---this time to the Monument---for the purpose of taking photos to be used in a collage. If the lighting is right, you can also take some shots for our next assignment---backlit landscape. Please meet at the front lobby for 2nd period. Don't forget your cameras and extra batteries. If you do, you'll be doing paperwork in the advancement center instead of going on the field trip.
Thursday, November 8, 2007
Portraits
On Friday, November 8th, we will begin retouching portraits. I have lots of techniques for interesting editing, include whitening teeth, colorizing hair, nose job, frown to a smile, enhancing eyes and eyelashes, removing blemishes, wrinkles, and freckles, applying PhotoShop makeup, etc. I want you to experiment with several different techniques. Don't be in too big a hurry to get to the final photos for the project---perfect your techniques through experimentation and practice first! Be sure to take additional photos over the weekend so you'll have plenty to work with. Remember, it's more fun to work on an imperfect face!
Your portrait project will be to ENHANCE four portraits through the retouching techniques we will learn, and show 'before' and 'after' shots. Make sure you don't permanently alter your original so you'll have a before photo to use for comparison! You'll make contact sheets of 4 photos, showing two before and after shots side-by-side per page. You'll hand in two contact sheets at the end of class on Friday, November 16th. That's a total of 8 photos---4 'before' photos, and 4 'after' on two contact sheets.
I am looking for fairly drastic changes, so use your imagination! Some retouches will be natural-looking. I am not opposed to adding unusual things though (i.e. blue hair, whiskers, tattoos, etc.) Make sure everything you do enhances the image, not detracts from it. And keep it clean! If you are working on the face of a family member, friend, or classmate, make sure what you do will not offend! Your grade will be based upon the amount of work done, technical skill, and overall appearance of final photos. If you choose a harder portrait to fix, you'll likely get a higher grade than if you choose one that needs very little work. At least one photo of the four should include a vignette.
Deadlines
Backlit project will be due on Friday, November 11th. Make SURE that you can see the difference between your photo with flash and without. Subject should be no more than 8 feet from camera! Paste the final two photos side by side.
You should have lots of portraits by now from our field trip on Tuesday. Take more over the weekend. We'll be working with these images for quite a while, so please make sure you have plenty. Have a minimum of 35-40 good head-and-shoulders shots of individuals (one person per photo!) Your contact sheet of 12 is due on Tuesday, November 13th.
Thank you for the photo cards some of you made for our Veterans. Those have to be in by 3:30 today to make it out on time!
Any other work can go in the late folder. Remember, it is far better to turn a project in late than to take a NHI!!
Monday, November 5, 2007
November 6th and 7th
Don't forget we have been kicked out of our classroom for these two days! We'll meet at the front doors of the school on Tuesday to go on a field trip to the Butterfly Garden. Make sure you have your camera and extra batteries! The purpose of our trip will be to take portraits in natural light. Keep in mind the tips you've read and seen in the videos. We will be working with portraits for quite a while, so please make sure you take plenty. We will soon be mixing these photos into a collage, so if you see some nice nature shots, you will probably have an opportunity to use those as well.
On Wednesday we'll meet in the library. We will each do a Photography Book Review.
Thursday we'll be back in our class to edit portraits.
On Wednesday we'll meet in the library. We will each do a Photography Book Review.
Thursday we'll be back in our class to edit portraits.
check out You Tube
Just found some interesting You Tube videos on portrait retouch. Here's a good one:
www.youtube.com/watch?v=eQWt3Kx4DGY
others:
http://www.youtube.com/watch?v=aHLpRxAmCrw
http://www.youtube.com/watch?v=5iwaQ2zi63c
http://www.youtube.com/watch?v=BlV7I8Qm7Vw
http://www.youtube.com/watch?v=C1wX0b3X3RQ
www.youtube.com/watch?v=eQWt3Kx4DGY
others:
http://www.youtube.com/watch?v=aHLpRxAmCrw
http://www.youtube.com/watch?v=5iwaQ2zi63c
http://www.youtube.com/watch?v=BlV7I8Qm7Vw
http://www.youtube.com/watch?v=C1wX0b3X3RQ
Thursday, November 1, 2007
Perspective vs. Point of View
While grading your papers on composition I discovered that quite a few of you seem to be having difficulty understanding the difference between these two terms. I'd like to try to clarify this for you.
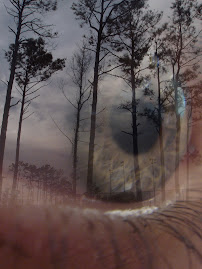
PERSPECTIVE:
Imagine standing on a path with a row of trees running along the side. As you look out to a point on the horizon, you’ll naturally see that the path, and the trees appear to get smaller the further away they are from you. This demonstrates the principle of linear perspective. When you shoot a photo that clearly shows linear perspective (objects getting smaller the further they are away from you), you visually add a greater sense of depth to the image. An explanation based upon the rules of geometry can be found at http://www.ski.org/CWTyler_lab/CWTyler/Art%20Investigations/PerspectiveRules/PerspectiveRules.html . A less complicated explanation which addresses the topic as it relates to art is presented at http://www.handprint.com/HP/WCL/tech10.html .
POINT OF VIEW:
Point of view refers to the physical location of the camera with respect to the subject. Every scene has many points of view. Your job is to find a viewpoint that is unique and interesting. There is no law that says all pictures have to be taken from eye level and straight on. In fact, this type of photo is usually somewhat boring and uninspired. By taking a picture from a different angle, you can produce a totally new feeling, mood or effect. The worm's eye view can be pretty interesting. By lying down on your stomach, you can get flowers in the foreground to frame your subject. If you are taking pictures of small children or pets, getting the camera down on their level can improve results. You can also avoid cluttered or ugly background by changing your point of view. Climbing up on things and looking down from a high point of view offers lots of different opportunities. The creative photographer will experiment with many different positions of the camera. Read more about this at http://www.montenagler.com/Article021906.asp
Portraiture
We are still studying lighting, but we will begin taking some portraits as well. Be prepared to go on a field trip on Tuesday for that purpose. We'll take some portraits of each other in natural light. Don't forget your camera and extra batteries!
Subscribe to:
Posts (Atom)