Monday, April 28, 2008

Metaphor Self-Portrait

Metaphor--1) A figure of speech in which a word or phrase that ordinarily designates one thing is used to designate another, thus making an implicit comparison, as in “a sea of troubles” or “All the world’s a stage” (Shakespeare). 2) One thing conceived as representing another; a symbol: “Hollywood has always been an irresistible, prefabricated metaphor for the crass, the materialistic, the shallow, and the craven” (Neal Gabler).

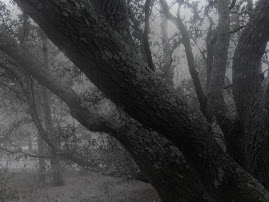
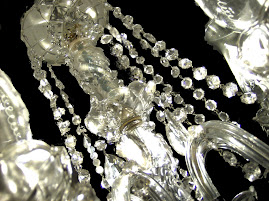
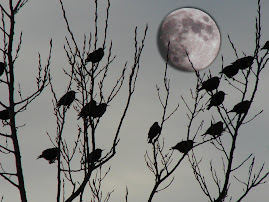
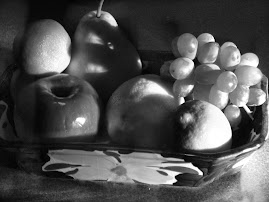
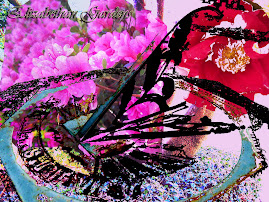
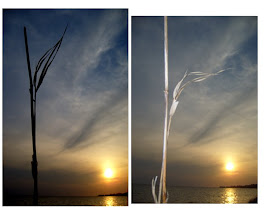
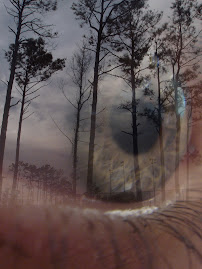
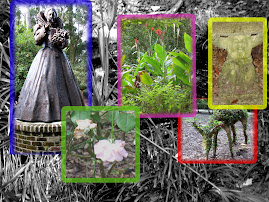
Still Life--Still life is the photography of small groups of objects, either found or put together for the purpose. It may simply be concerned with formal qualities (tones, textures, colours, shapes, form etc) or have a more metaphorical intent.

Check out these sites:

http://www.shutterpoint.com/Photos-BrowseCat.cfm?cat_id=7

http://www.shutterbug.net/refreshercourse/lens_tips/1205back/

http://www.betterphoto.com/gallery/dynoGall2.asp?catID=17

Most of what you see here is considered ‘Still Life’ photography involving various inanimate objects in a pleasing arrangement.

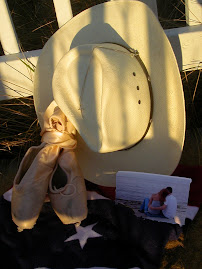
Read these instructions carefully. This photograph is about you. It is a portrait of you. The only thing different is that you are not in it. This picture is a still life, a metaphor that contains at least three things that represent who you are. Your friends should be able to look at it and recognize you in the picture. This picture should not contain any living things, only still objects. It should represent things you are passionate about.

Pay special attention to lighting and arrangement of the items. Change them up and see what works best. You will make a contact sheet with 12 different photos that represent YOU. This contact sheet will be due on Monday, May 5th. A contact sheet of the best 6 photos edited will be due on Wednesday, May 7th, along with your best color 5x7 JPEG. You may apply filters if you wish.

Next topic---Action Photography

Next we will cover Action (Sports) Photography. If you have the opportunity to take any action shots at home, practice, or games, you'll be ahead! I hope to take the class outside this week to get action shots at school. Please remember to bring your cameras for the rest of the week. In the meantime, those of you who are caught up may research on the Internet for Sports or Action Photography. In particular, you find out about these terms:
Stop Action
Blurred Action
Panning
Find examples of each. These shots are created by adjusting the shutter speed. Read up on the mechanics involved in this type of photography. You will be re-creating each of these techniques. Our goal will be to create stop action, blurred action, and panning in the camera. If not, these effects may be created in PhotoShop through use of the 'Motion Blur' filter. Practice using this filter on your photos.
Research using these links:
Professional Photographers who specialize in Action Photography:
http://www.padulaphotography.com/
http://www.actionsportsinc.com/eventdisplay.aspx?is=9
http://www.actionathletics.com/
http://www.actionsportsphotography.sasktelwebsite.net/
http://www.actionsportspress.com/
http://www.greggriess.com/action_main.htm
‘How to’ Sites:
http://photo.net/learn/sports/overview
http://www.popphoto.com/popularphotographyfeatures/4016/how-to-photograph-baseball-and-softball.html
http://www.nyip.com/ezine/sports/golf.html
http://www.squidoo.com/action-photography/
http://www.nyip.com/ezine/sports/football.html
http://www.popphoto.com/popularphotographyfeatures/4334/how-to-show-an-action-sequence.html
http://www.schoolofphotography.com/if/infocus22.html

Your Action Project will be to leave a contact sheet of 12 action shots right out of your camera on May 1st. Then you'll create four images---a stop action, a blurred action, a panning shot, and a poster with text. Make a contact sheet of these four shots for your final submission on Thursday, May 2nd.

Thursday, April 24, 2008

Photo Contest!!

Photo Contest - North Carolina State University's Climate Office is
sponsoring a 'Young Weather Photographers' contest for students between the
ages of 7-16. The deadline to submit a photo is June 30. Contest details
are available online at
http://www.nc-climate.ncsu.edu/education/contest.php.
Questions may be
directed to Shannon Futrell at safutrel@ncsu.edu.

Text

Experimenting with Text

Go to the following sites and check out the tutorials for PhotoShop text:
http://graphicssoft.about.com/od/photoshoptutorialstextfx/Creating_Text_Effects_with_Photoshop.htm
http://www.photoshopessentials.com/photoshop-text/text-effects/image-in-text.php
http://www.planetphotoshop.com/category/text?id=tutorials_text
http://www.dwphotoshop.com/photoshop/textindex.php
http://www.tutorialized.com/tutorials/Photoshop/Text-Effects/1
http://www.fstutorials.com/category/photoshop_text_effects_tutorial/9/
http://www.photoshoproadmap.com/Photoshop-blog/2007/07/22/the-best-80-photoshop-text-effects-on-the-web/
http://www.designvitality.com/blog/2007/09/photoshop-text-effect-tutorial/
Choose several that you particularly like, and follow the step-by-step instructions to create your own special effects text. Start each one on a new 8x10 canvas. On Friday, you will print a contact sheet of your best FOUR creations in color! Use your choice of special effects and your choice of words. Keep it imaginative, but clean! Project will be graded on creativity, skill, and effort, with consideration for level of difficulty.

Tuesday, April 22, 2008

NHIs

Just to help you stay on target, here are the things you should have turned in for this grading period as of Tuesday, April 22nd:

*8x10 Montage of at least 6 OBX shots
*Macro (contact sheet of 12, 6 edited, 1 best 5x7 JPEG)
*Research Paper on composition (explanation and sample photo on specific topics you were given)
*"Theories" photo shoot (contact sheet of 12 labeled shots, 6 on word doc. with explanation)
*Backlit Project (6 you like from Internet on word doc., 12 on contact sheet with and without flash, 6 edited, best pair side-by-side)
*for tomorrow, Collage using elements of at least three photos
*for tomorrow, Backlit Landscape (contact sheet of 12, 6 edited, 1 best 5x7 JPEG)

As I have told you several times, this is a class where NHIs will really hurt since projects make up 60% of your grade. If you have not turned in any of the above, PLEASE get them in to the late folder!

Monday, April 21, 2008

Still Life Photography

Check out the following sites:
http://webhome.idirect.com/~dpl/gallery1.html
http://www.betterphoto.com/gallery/dynoGall2.asp?cat=17
http://www.usefilm.com/photo_category/16/Pictures_of_Still_Life.html
http://www.apogeephoto.com/mag2-6/mag2-7winners.shtml
http://www.stilllifewith.com/2006/07/14/photo-contest-from-food-wine-magazine/
http://stilllifewith.com/2006/12/01/stw-challenge-for-december-tradition/
http://digitalmedia.oreilly.com/2004/09/15/food_photos.html
http://www.markhemmings.com/MarkWebsite/food_photography/index.htm
http://dessertfirst.typepad.com/dessert_first/2006/05/food_photograph.html

Basic Principles of Still Life Photography:
Throughout the decades, artists have depicted still life scenes—arrangements of inanimate objects—in paintings and photography. Shooting still life subjects is one of the best ways to sharpen your photographic skills. You can take your time, and your subject remains stationary.

Good composition, framing and lighting are all very important to translate your still life into a great photo. Every day we are bombarded with still life images of appetizing foods, shiny housewares and other appealing products in magazine ads, brochures and catalogs. Professionals spend a great deal of time setting up these shots and you can learn a lot just by studying the photos you find most appealing and unique.

Notice how photographers use repeating shapes and lines to create patterns and use complimentary colors. Study the lighting that they use. Simplicity is very important when composing still lifes. You don’t need to collect a wide range of complicated objects to create an interesting picture. Instead, choose a few objects with a common thread.

The arrangement of a still life should begin with the positioning of a single dominant subject. Then add other objects one at a time, and examine the arrangement through your camera’s viewfinder. Experiment with your camera angle until the scene shows the elements in the most pleasing balance. Photograph the original grouping, and then rearrange or remove objects to see if it improves the composition.

Your next project will involve setting up a still life of specific objects and photographing it. To help prepare you, read the previously mentioned articles and find 6 still life photographs from the Internet that you particularly like. These photos should include only inanimate objects. Paste the 6 photos to a one-page word document (two columns) and write a short paragraph about each. Tell what techniques the photographer used that appeal to you. This will be due at the end of class Friday, April 25th. Turn in a hard copy, and leave a copy in the completed assignments folder.

Over the weekend, take still life photographs of FOOD AND/OR BEVERAGES. Experiment with the arrangement and lighting. Take some photos with flash and some without. Be creative! Think about the elements of composition we have just studied.

Be prepared to work with your food photos Monday, April 28th. A contact sheet of 12 will be due at this time. If you do not have your photos Monday, you will be writing a paper on still life photography while the rest of us work in PhotoShop. The 6 edited and best 5x7 are due at the end of class. The alternative assignment, a 3-page paper on Photographic Still Life, is due then as well. We will move on to the next topic Tuesday. Unless you are absent Monday, you are expected to have this project completed that day.

Friday, April 18, 2008

Backlit Landscape for Monday

You've all taken pictures of landscapes now, and you've done backlit close-ups. Now you should take 35-40 photos of backlit landscapes. Any time you are shooting into the sunlight, it is a backlit shot. The sun does not have to be visible. The light just has to be coming from straight ahead. Any sunrise or sunset would be backlit. We are going for beauty. These should be distance shots that show the horizon. Think...calender shot. Contact sheet of 12 due Monday, April 21st. 6 edited shots and one best 5x7 due Wednesday, April 23rd.

Wednesday, April 16, 2008

Collage

We will be learning how to make collages this week! You should make your own following the techniques of good composition. Be careful to cut objects out neatly before introducing them to the background photo. Use your "opacity" slider. Use objects of different scale to add interest and an abstract quality. Add some text. Use elements of at least three separate photographs in your collage. This is due next Wednesday.

Camera Test Friday

Please remember to bring your camera to school on Friday. We'll be taking a test on composition where you'll have to set up certain situations to photograph. If you forget your camera, you'll be taking an essay test instead in the Advancement Center. To prepare, make sure you are familiar with all the "Theories of Composition" we have studied.

Next week you will take a Critique Test where you'll have to write a critique on a piece of art. You'll need to be able to identify the use or misuse of techniques of composition, and be able to describe using all the proper terminology.

If you have completed your research paper, both these tests should come easy for you. If not, you are late with the paper, and will likely fail both tests. If you're that far behind, please plan to come in after school to catch up!!

Monday, April 14, 2008

Backlighting Project

Our next unit will be on lighting. We'll be seeing some films and doing some reading. Start by reading chapter 7 in the 'Exploring Photography' text book.

Our project will be to concentrate on backlighting, which is anytime the light is coming from behind the subject.

Here is a copy of the handout on this project. Contact sheet due 4/14 and final project due 4/18.

Backlighting Project
Read the article at www.picturecorrect.com/photographytips/backlighting_photography_tips.htm
Read the article at
www.apogeephoto.com/may2005/wtbird5_2005print.html
Use the Internet to find six backlit photos that you particularly like. Copy and paste to a word document—one page, two columns. Write a short paragraph about each photo explaining what you find appealing about it. Turn in to completed assignments folder.

Take 35-40 photos that are backlit. These should be a mixture of natural scenes and scenes you set up, all close-up’s (within 8 feet of subject). For each shot, take one with a flash, and one without. Make a contact sheet of the best 12. I am looking for photos where the backlighting is obvious, and enhances the subject. Turn in the following photos for your final project grade:

-One 5x7 JPEG close-up, interior or exterior, with backlighting—no flash!
-The same close-up shot, backlit, but with fill light from a flash
The two identical photos should be placed side-by-side before submitting for grading.

When you complete this project, you will have three pages:
1) The word document with the six photos you found on the Internet and captions describing what you like about them
2) The two identical 5x7’s, one with flash and one without, mounted side-by-side
3) The contact sheet of your 12 best shots

Thursday, April 10, 2008

More on Composition

By now you should know a lot about photographic composition! You've seen my in-class demonstrations with explanations of the individual theories of composition. You've done some reading, watched films, researched the Internet, and written a paper. You are now completing your "Theories of Composition" Photo Shoot. To further help prepare you for the test next week, please follow these links for some good additional reading. See me if there is any topic you are unsure about. This may be the most important thing we'll cover as it effects EVERY picture you take! http://photoinf.com/General/Wendy_Folse/Composition_Part_I_Theme_Emphasis_Simplicity_Rule_of_Thirds.htm
http://photoinf.com/General/Wendy_Folse/Composition_Part_II_Horizontal_or_Vertical.htm
http://photoinf.com/General/Wendy_Folse/Composition_Part_III_Perspective_Focal_Point_Cropping.htm
www.larrysizemore.com/articles/COMPOSITION.pdfhttp://
www.scphoto.com/html/composition.html

Wednesday, April 9, 2008

Theories of Composition Photo Shoot

You were given the following assignment yesterday, and most of you were able to get your photos taken during class. Please complete by Friday. You may take photos on school grounds or off.

“Theories of Composition” Photo Shoot


We have studied various elements of design and techniques for achieving good photographic composition. Your assignment is to take a number of photographs that illustrate the following:
· Proper use of the Rule of Thirds
· Good choice of background to accentuate subject
· Depth of field used to accentuate the subject (selective focus)
· Perspective lines used to create depth
· Demonstration of scale
· Framing with objects in foreground
· Unusual point of view to create interest
· Dynamic composition with proper use of diagonals
· Emphasis on texture
· Use of repetition (either color, shape, or line)
· Good use of negative space
· Asymmetrical balance
· Positioning action moving into frame

We have also discussed design mistakes that should be avoided. Take photos that illustrate what NOT to do:
· Merging
· Poor choice of background
· Subject moving or looking out of frame
· Undesirable cut-off
· Centered composition (boring, static)
· Lens flare
· Lack of simplicity where subject is not clearly defined

Download the photos and make a contact sheet showing 12 different topics outlined above. Do not edit in PhotoShop! Use them just as they came out of camera. Title each photo to indicate what you are illustrating. Select the six that you feel best illustrate six different topics. Copy and paste to a Word document with a paragraph about each photo. You should describe how each photo depicts good composition through the proper use of these techniques or poor composition because of design mistakes. Leave the contact sheet in the completed assignments folder on the 'N' drive. Print the word document and hand it in.

Perspective vs. Point of View

Perspective vs. Point of View
Students often have difficulty understanding the difference between these two terms. I'd like to try to clarify this for you. For purposes of this class I’d like for you to think of them in this way:
PERSPECTIVE:Imagine standing on a path with a row of trees running along the side. As you look out to a point on the horizon, you’ll naturally see that the path, and the trees appear to get smaller the further away they are from you. This demonstrates the principle of linear perspective. When you shoot a photo that clearly shows linear perspective (objects getting smaller the further they are away from you), you visually add a greater sense of depth to the image. An explanation based upon the rules of geometry can be found at http://www.ski.org/CWTyler_lab/CWTyler/Art%20Investigations/PerspectiveRules/PerspectiveRules.html . A less complicated explanation which addresses the topic as it relates to art is presented at http://www.handprint.com/HP/WCL/tech10.html .POINT OF VIEW:Point of view refers to the physical location of the camera with respect to the subject. Every scene has many points of view. Your job is to find a viewpoint that is unique and interesting. There is no law that says all pictures have to be taken from eye level and straight on. In fact, this type of photo is usually somewhat boring and uninspired. By taking a picture from a different angle, you can produce a totally new feeling, mood or effect. The worm's eye view can be pretty interesting. By lying down on your stomach, you can get flowers in the foreground to frame your subject. If you are taking pictures of small children or pets, getting the camera down on their level can improve results. You can also avoid cluttered or ugly background by changing your point of view. Climbing up on things and looking down from a high point of view offers lots of different opportunities. The creative photographer will experiment with many different positions of the camera. Read more about this at http://www.montenagler.com/Article021906.asp

Monday, April 7, 2008

This week's assignments...and grades!

As you all know, I was busy last week getting your final grades in for report cards. I'm sorry that I failed to show you macro photography on the big screen as I had planned last Friday. I will do that today, and will suspend your deadline on macros until Wednesday. By Wednesday, April 9th, you should have 35-40 extreme close-ups. This will be a '12-6-1' assignment, your first grades of the final grading period.

Don't forget that we do not have access to our computer lab on Tuesday, April 8th. Therefore, we will work outside if the weather permits, or in the library if not. BRING YOUR CAMERA!! I will plan for us to take photos that illustrate the theories of composition.

You should also begin your research paper today, with the final paper due on Friday, April 11th. It is important that you address EACH of the topics I have given you, and find photographic examples for EACH. Do a good job on this. It will be graded like a project (60% weight).

Several of you will be disappointed when you see your report cards. You MUST pay attention to these deadline grades! While the weight for deadlines is only a small portion of your final grade, several zeroes can really hurt you. One missed deadline can drop your grade a couple of points. Several can bring you down a letter grade or more. If it's Monday, you owe me pictures for a deadline grade of 100 or zero!!!

Also, several of you had NHIs that were never submitted. At 60% of your final grade, even one missed project can seriously hurt in this class. Make sure you save things properly, with your identification number and as a JPEG. ALWAYS check to see that what you think you've turned in actually gets saved so that you can receive credit for your work. Remember to keep a copy of everything you turn in!

To recap....By Friday, April 11th, you should turn in your Macro 12-6-1, your research paper on 'Photographic Composition', and the photographic assignment I will give Tuesday on our field trip. Our next unit will be 'lighting'!

Wednesday, April 2, 2008

For Monday...

...MACRO photography. See the following sites for tips:
http://photo.net/learn/macro/
http://en.wikipedia.org/wiki/Macro_photography
http://www.shutterbug.net/techniques/outdoor_travel/0803sb_amacro/
http://www.crystalcanyons.net/pages/TechNotes/3DMicroMacro.shtm
http://www.edbergphoto.com/pages/Tip-macro-tools.html
http://www.edbergphoto.com/pages/Tip-macro-examples.html
http://www.pdnonline.com/pdn/cp/olympus/technology/article_display.jspvnu_content_id=1003285355

Take 35-40 pics of various objects extremely close-up. In most cases, you will use the 'Macro' setting, or 'tulip' icon. If your camera doesn't take a good, clear close-up, find out what is the closest distance you can get a picture in focus---and stand that far away from your subject. We can sharpen a photo up a bit in PhotoShop, but it needs to pretty much be in focus. Experiment with your own camera. Some will be able to take really good clear shots that will amaze because they are SO close-up. Others will have to stand back a ways to get your subject in focus. We can always zoom in while cropping in PhotoShop if you have trouble. Make sure you are on the correct setting! Use the theories of composition we just learned!

Tuesday, April 1, 2008

IMPORTANT!!! NHIs

I have quite a few NHIs that will be showing up on report cards as zero unless these projects are submitted by 5:00 p.m., April 2nd. Remember, I show NHI (not handed in) in my books until you have submitted all pieces of a project. For example, if you only turn in a final picture on a 12-6-1 assignment, you will show as NHI until the contact sheet of 12 straight out of the camera, and the contact sheet of 6 edited photos are turned in.

If your number is listed here and you have completed it and believe you have turned the project in, just submit another copy. You should be retaining a copy for your records of everything you do. You may have turned it in with no number or the wrong identification number, or maybe you saved it in the wrong place or without changing it to a JPEG. In any case, if your number is listed here, I do not have your work. Submit the ENTIRE project (all pieces) to the late folder by 5:00 to get credit for the work on this report card.

The following are NHI as of 3:30, April 1st:

Architecture Project (contact sheet of 12 straight out of camera, 6 edited, 1 best 5x7)--
21,24,210

Spirit Week Project (Word doc. of photos w/captions or alternative 5-page paper)--
21,24,210,219

Depth of Field (12-6-2 same shot, showing both shallow and deep depth of field)--
21,24,26,27,210,212,219

Portrait Retouch (contact sheet of 12 and 8 before and afters, one w/vignette)--
22,24,210,212

PhotoShop Techniques or "Paint Project" (painting and list)--
21,24,26,210,212,219

8-1 exercise (contact sheet of edited photos and list)--
24,27,219

Landscape or Seascape (12-6-1)--
21,22,24,26,212,219

Clothing Advertisement (contact sheet of 12 full body shots and final ad)--
21,22,27,217

Research Paper on Composition

You have a Research Paper on Composition due at the end of class on April 9th. It will be given the same weight as any photographic project. Make sure you discuss EVERY topic, and find photographs on the Internet (or use your own) for EVERY topic. Use your own words!

Here are the written instructions from the hand-out you received in class:

Plan and write a report on Photographic Composition. Use the books in the classroom and/or photography sites on the Internet for your research. Include each of the following topics:
Lens choice
Rule of thirds
Background choices
Depth of field
Perspective
Framing
Point of View
Use of lines, shapes, form, pattern, textures, etc.
Explain each topic and include photos which are examples of each. You may use your own photos, or get them off the Internet. If you get photographs from the Internet, remember that you must give credit to your sources. Give photo credit under each picture in your report. If you use your own pictures, be sure to give yourself credit! Write your paper in essay form, in your own words. DO NOT COPY AND PASTE! Be sure spelling and grammar are correct, your examples look good, and your paper is well organized. List “Works Cited” at the end (bibliography).

Grading will be as follows:
Opening---What is composition? (5 points)
Lens choice, explanation and examples of several (10 points)
Perspective, explanation and examples (10 points)
Subject/Rule of thirds, explanation and examples (10 points)
Choice of Background, explanation and examples of good and poor choices (10 points)
Depth of Field, explanation and examples of several types (10 points)
Framing, explanation and examples (10 points)
Point of View, explanation and examples of each type (10 points)
Use of lines, shape, form, pattern, texture, etc., explanation and examples of each (10 points)
Closing---Summary (5 points)
Layout, general appearance, and ‘Works Cited’ (10 points)

You will be given three hours to research and write this paper. Do a good job!

Montage

Using the locational photos you took over spring break, make a montage. You should use a minimum of six photos. You may use a photo for the background or just a solid color, gradient, or pattern. Make sure the background does not compete with the smaller pictures you place in the foreground. You may want to adjust the contrast on the background to very light or very dark, or use grayscale or a color wash on the background, to make the foreground photos stand out. See me if you need help with any of these techniques.

Your smaller pictures that you use in the foreground should have unity in theme, color, or pattern. Each photo (layer) should have some special effect like 'dropshadow' or 'beveled edge'. Make sure the photos "flow" and are not disconnected from one another visually. Try not to use any set pattern for the placement of the smaller photos.

Your montage should include the text of your choice and your name. Do something special with the lettering as well!

When you have finished, leave your 8x10 montage in the completed assignments folder with your ID number. This is due on Thursday, April 4th. Do a good job!