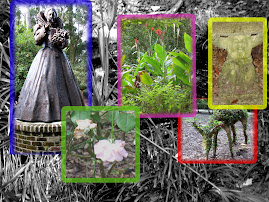
I have extended the deadline for the catalog page/clothing advertisement until April 1st, early in the period. We will also be starting a new unit on 'Composition' and doing a Montage this week.
Also, I would suggest that each of you check back in the entries of this web page, and make sure you have turned in all projects listed here. Even if they are past due, turn them in!! You do not want a 'NHI' in this class! I will take late work until April 2nd, 5:00p.m. After that, I HAVE to close out grades for this report card.
Monday, March 31, 2008
Wednesday, March 19, 2008
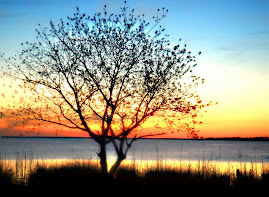
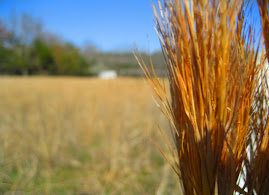
For Spring Break...
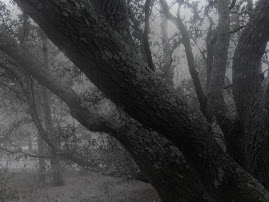
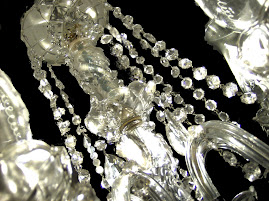
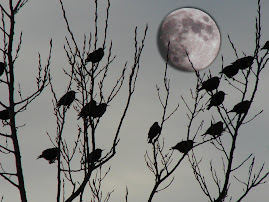
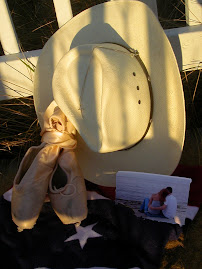
...take lots of 'locational' photos. If you are in the OBX you can take pictures of the beach, Jockey's Ridge, Monument, etc. There should be a variety of shots---some distance, some close-up, some colorful, some subtle, some with people, some just scenery. We have two projects that will require several photos each. You will turn in a contact sheet of 12 on Monday when we come back, but you need many, many more images!
If you are going to be away for break, your photos can illustrate your holiday location. However, since you won't be able to go back and duplicate missed shots, make certain you have enough pictures and that they are securely stored!
If you are going to be away for break, your photos can illustrate your holiday location. However, since you won't be able to go back and duplicate missed shots, make certain you have enough pictures and that they are securely stored!
Next Project...
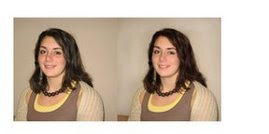
Today you should be wrapping up your Before and After Project. Please submit the contact sheet of 12 straight out of your camera, and two contact sheets of 4 photos--before and after shots. You should turn in four 'before' shots and four 'after', on two contact sheets. Make sure the appropriate photos are side-by-side. At least one portrait must contain a vignette.
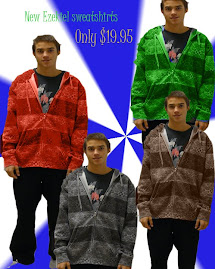
When you have finished the portraits, we are going to work with the full-body shots you had due on Monday. We will be putting together a catalog page this week using those photos. You will be experimenting with the color replacement tool in PhotoShop (same tool as is used for redeye) to show an article of clothing in several different colors. You may even want to design a pattern to use! Your "advertisement" must include text. Think about your font and size of type, as well as your background choice. You want your catalog page to really grab the attention of your "buyer". This will be due on Friday by the end of class.
When you have finished the portraits, we are going to work with the full-body shots you had due on Monday. We will be putting together a catalog page this week using those photos. You will be experimenting with the color replacement tool in PhotoShop (same tool as is used for redeye) to show an article of clothing in several different colors. You may even want to design a pattern to use! Your "advertisement" must include text. Think about your font and size of type, as well as your background choice. You want your catalog page to really grab the attention of your "buyer". This will be due on Friday by the end of class.
Thursday, March 13, 2008
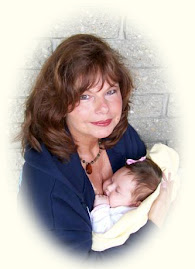
Portrait "Before and After" project
This week we began retouching portraits. I have lots of techniques for interesting editing, include whitening teeth, colorizing hair, nose job, frown to a smile, enhancing eyes and eyelashes, removing blemishes, wrinkles, and freckles, applying PhotoShop makeup, etc. I want you to experiment with several different techniques. Don't be in too big a hurry to get to the final photos for the project---perfect your techniques through experimentation and practice first!
Be sure to take additional photos over the weekend so you'll have plenty to work with. Remember, it's more fun to work on an imperfect face!Your portrait project will be to ENHANCE four portraits through the retouching techniques we are learning, and show 'before' and 'after' shots. Make sure you don't permanently alter your original so you'll have a before photo to use for comparison!
You'll make contact sheets of 4 photos, showing two before and after shots side-by-side per page. You'll hand in two contact sheets at the end of class on Wednesday, March 19th. That's a total of 8 photos---4 'before' photos, and 4 'after' on two contact sheets.
I am looking for fairly drastic changes, so use your imagination! Some retouches will be natural-looking. I am not opposed to adding unusual things though (i.e. blue hair, whiskers, tattoos, etc.) You should do a good job with whatever you do and try to make it look realistic. Keep it clean! If you are working on the face of a family member, friend, or classmate, make sure what you do will not offend! Your retouched pictures will be critiqued on the big screen by all my photography classes.
Your grade will be based upon the amount of work done, technical skill, and overall appearance of final photos. If you choose a harder portrait to fix, you'll likely get a higher grade than if you choose one that needs very little work. At least one photo of the four must include a vignette.
CHECK YOUR FOLDER
If you are serious about Photography, and about this class, you should have hundreds of pictures taken by now. If you don't, you need to spend more time with your camera! You can not do well in this class unless you are out there taking lots of pictures of everything! Practice makes perfect---with picture taking as well as with PhotoShop.
Wednesday, March 12, 2008
Depth of Field
Last week we studied depth of field and you took pictures using the "mountain icon" to show full focus, and the "tulip icon" to show selective focus. You turned in twelve shots (6 sets of each) on a contact sheet straight out of the camera, six shots (3 sets of each) edited, and your best two---same shot, one with deep depth of field/one with shallow. If you failed to turn this assignment in by the due date (March 7th), you can still do it and submit it to the late folder. It is not wise to take ANY NHIs (zero for not handed in) in this class since Projects make up 60% of your grade. For additional information on Depth of Field, see the following sites:
http://www.apogeephoto.com/feb2005/jaltengarten2_2005.shtml
http://www.apogeephoto.com/feb2005/jaltengarten2_2005.shtml
Art Show!!
All students should submit three pieces to be considered in the upcoming Art Show. You will get a participation grade for this, so I am expecting everyone to submit!
Next Photo Shoot...
...will continue with the idea of photographing people. This time it will be full-body shots. One person per photo. Think...fashion photography, modeling.
Check out these sites for inspiration:
http://www.picturecorrect.com/photographytips/photographing_people_advice_tips.htm
http://www.picturecorrect.com/articles/preparing_portrait_photo_shoots.htm
Contact sheet of 12 photos will be due on Monday, March 17th.
Check out these sites for inspiration:
http://www.picturecorrect.com/photographytips/photographing_people_advice_tips.htm
http://www.picturecorrect.com/articles/preparing_portrait_photo_shoots.htm
Contact sheet of 12 photos will be due on Monday, March 17th.
PhotoShop Techniques Project "Paint Project"
You are working on a project which is designed to acquaint you with some of the various tools available to you in PhotoShop. For this project, the process is more important that the end result---although I would love to see some great looking pictures turned in. I have given you a list of tools you should experiment with on a blank canvas. This project does not involve a photo at all. Don't worry too much about what specifically you are "drawing"---that part will come as you work. Just experiment with all the things PhotoShop can do. You will be amazed! Likely, you will have done everything you can possibly do on one canvas before you get to the bottom of the list. Start a new canvas! You can turn in several. There is also a written component to this assignment. You should keep a list of everything you tried. Keep your descriptions short (ex: leaf brush/green, gradient blue, etc.). When you're done, turn in your list and print your ONE best design. Leave all others in the completed assignment folder. Note: You will not be able to save this one as a JPEG---just use PSD.
Here's a copy of the list:
PhotoShop Exercise
Experiment with Toolbox/Options
Make a painting using each of the following techniques. Start with a blank page (no photograph). You may want to consult your handout of the Toolbox map (Toolbox is on the left of your screen; Options windows on the right; Menu bar at top). Briefly describe what you did for each step on the back of this page or on notebook paper.
*Open Adobe PhotoShop from ‘Programs’ or icon on desktop
*From Menu Bar--- File>new--- Create a blank page, 8"x10" RGB, 200 ppi, 16 bit
*From Menu Bar---Window>brushes, history, layers, color, swatches, tools, options (make sure these items are checked/window appears on the left of your screen for each)
*Select each of the following from the Toolbox and create a “painting”:
pencil (use several sizes)
paint brush (use custom brushes--select load brushes from Brush Palette menu; use texture brushes; pick several different sizes and shapes of brushes; experiment with options in Menu Bar---diameter, softness, mode, opacity, flow; click on all arrows to get other options; use airbrush-- experiment with adjusting pressure)
paint bucket (to fill in large areas)
*Select colors from Color Palette window—experiment with tabs (color, swatches, styles) *Experiment with color selection options in Toolbox (the two blocks of color, black, white, or whatever color you chose last)--background, foreground, switch colors using arrows
*Use Adobe color picker (click arrow in Color Palette window)
*Create several new layers (Layer>new); Copy something from background and paste to another layer-- Rename to indicate what’s there by double clicking on layer (the layer will be blue to indicate which one you’re accessing) Put something on each layer
*Use the eye dropper from the Toolbox to select a color from within the picture and repeat somewhere else
*Experiment with opacity (in Layer window) and other options (click arrow)
*Select an area with magic wand from Toolbox; Extend selection with wand by shift/click
*Experiment with layer styles (the cursive ‘f’ icon at the bottom of the Layer window)
*Soften an item on a layer by using filter>blur>Gaussian Blur
*Change the order of layers by dragging one to the bottom in the Layer window
*Experiment with show/hide buttons in layers (the 'eye' icon)
*Paint using the Wet Edges option in Brush window
*Use gradient (Toolbox); Experiment with all options
*Paint straight lines with shift/click
*Try the special effects brushes from the Menu Bar (click arrow)
*Experiment with feathering edges by using anti-alias (Menu Bar) before selecting an item with lasso: Feather edges on existing selections with Select>feather, an amount>ok
*Use the various eraser tools in Toolbox
*Use the zoom tool to work in small areas (Toolbox)
*Experiment with Edit>Transform>(All options---from Menu Bar)
*Add text/Enhance text with a special effect---‘T’ from Toolbox, then Layer>Layer Style>(experiment with your choice of special effects) from Menu Bar
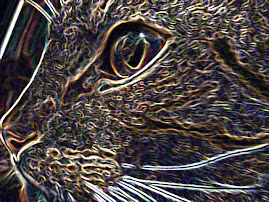
*When painting is complete, experiment with various filters, particularly Artistic options and Sketch options
*Save in 'Completed Assignments' folder using your id#, then 'Paint Activity'
*Turn in your sheet with a brief description of what you did (checklist is fine)
*This will be graded as a Project—DO A GOOD JOB!
Here's a copy of the list:
PhotoShop Exercise
Experiment with Toolbox/Options
Make a painting using each of the following techniques. Start with a blank page (no photograph). You may want to consult your handout of the Toolbox map (Toolbox is on the left of your screen; Options windows on the right; Menu bar at top). Briefly describe what you did for each step on the back of this page or on notebook paper.
*Open Adobe PhotoShop from ‘Programs’ or icon on desktop
*From Menu Bar--- File>new--- Create a blank page, 8"x10" RGB, 200 ppi, 16 bit
*From Menu Bar---Window>brushes, history, layers, color, swatches, tools, options (make sure these items are checked/window appears on the left of your screen for each)
*Select each of the following from the Toolbox and create a “painting”:
pencil (use several sizes)
paint brush (use custom brushes--select load brushes from Brush Palette menu; use texture brushes; pick several different sizes and shapes of brushes; experiment with options in Menu Bar---diameter, softness, mode, opacity, flow; click on all arrows to get other options; use airbrush-- experiment with adjusting pressure)
paint bucket (to fill in large areas)
*Select colors from Color Palette window—experiment with tabs (color, swatches, styles) *Experiment with color selection options in Toolbox (the two blocks of color, black, white, or whatever color you chose last)--background, foreground, switch colors using arrows
*Use Adobe color picker (click arrow in Color Palette window)
*Create several new layers (Layer>new); Copy something from background and paste to another layer-- Rename to indicate what’s there by double clicking on layer (the layer will be blue to indicate which one you’re accessing) Put something on each layer
*Use the eye dropper from the Toolbox to select a color from within the picture and repeat somewhere else
*Experiment with opacity (in Layer window) and other options (click arrow)
*Select an area with magic wand from Toolbox; Extend selection with wand by shift/click
*Experiment with layer styles (the cursive ‘f’ icon at the bottom of the Layer window)
*Soften an item on a layer by using filter>blur>Gaussian Blur
*Change the order of layers by dragging one to the bottom in the Layer window
*Experiment with show/hide buttons in layers (the 'eye' icon)
*Paint using the Wet Edges option in Brush window
*Use gradient (Toolbox); Experiment with all options
*Paint straight lines with shift/click
*Try the special effects brushes from the Menu Bar (click arrow)
*Experiment with feathering edges by using anti-alias (Menu Bar) before selecting an item with lasso: Feather edges on existing selections with Select>feather, an amount>ok
*Use the various eraser tools in Toolbox
*Use the zoom tool to work in small areas (Toolbox)
*Experiment with Edit>Transform>(All options---from Menu Bar)
*Add text/Enhance text with a special effect---‘T’ from Toolbox, then Layer>Layer Style>(experiment with your choice of special effects) from Menu Bar
*When painting is complete, experiment with various filters, particularly Artistic options and Sketch options
*Save in 'Completed Assignments' folder using your id#, then 'Paint Activity'
*Turn in your sheet with a brief description of what you did (checklist is fine)
*This will be graded as a Project—DO A GOOD JOB!
Field Trips!
Please remember to bring your cameras every day so that we can go outside for picture taking when it's nice!
...it's been a long time...
...since I've been able to get into Blogspot. I am going to attempt to "catch up" the web page. We are currently working on portraits. You should have had 12 head and shoulders shots (one person per photo) to turn in for your deadline grade on Monday, March 10th. If you missed the deadline, you still need to turn in the contact sheet of 12 photos. We are going to do quite a bit of experimentation with facial retouching with these portraits. You will have the most fun with "imperfect" people---whitening teeth, removing wrinkles, freckles, or acne (even doing a "nose job!"). We'll show before and after shots, so make sure you don't alter your original! I'll give you details on the project later. For now, check out this web page and try some techniques!
http://www.photoshoproadmap.com/Photoshop-blog/2007/05/15/a-complete-guide-to-digital-makeover-in-photoshop/
Use these sites to help with Portrait taking:
http://www.picturecorrect.com/photographytips/photographing_people_advice_tips.htm
http://www.picturecorrect.com/articles/preparing_portrait_photo_shoots.htm
Subscribe to:
Posts (Atom)